Showing posts with label bag. Show all posts

Friday, May 3, 2024

Sewtopia Milwaukee

I am so excited to share about my trip to Sewtopia in Milwaukee! It was amazing. More amazing than I could have hoped. There are a bunch of pictures, and a lot of them are even more terrible than my usual sub-par standard because interior lighting is ROUGH. But hopefully they give you a good idea!


First, while my sewing bestie did not get a ticket initially, Megan and Amy saw my note on an instagram post that she had not gotten a ticket and when one came available a week before the event, they emailed me and offered it to her directly. So she got to go! I was majorly impressed with her spontaneity. I was nervous about being by myself when so many of the attendees had been before or were attending with friends and I worried I would feel lonely. That worry was unnecessary, as everyone was so exceptionally friendly and inclusive, but I was still glad she got to go. I didn't really know what to expect, but I did anticipate bringing home more than I took with the shop hop. I didn't realize how much extra stuff we'd bring home, though! We got amazing swag bags with patterns and precuts and batting and more, and everyone gets a doorprize at some point through the weekend, and many of them were fat quarter bundles. You can see the one I picked in a picture below, barely, in the picture with the pouch I received in the swap.

 The event on the whole was so fun. The shop hop was great and I got some fun fabric, including some great additions to the quilt I worked on for Latifah's class (more on that later). The saddest part to me was that the shops seemed understaffed and overwhelmed by our visit, and cutting and checking out took FOREVER. I only got to one shop at the second stop instead of both shops (which were just a block away from each other) because they had only one person cutting and one person checking out. So I waited roughly 40 minutes to get cut. I try to not feel FOMO too hard, but I was disappointed to not get to both shops. We also visited a quilt and textile museum, which was pretty cool, although it took longer than I think we really had budgeted for in the shop hop unfortunately. There was a 25 million stitches project on display, which was in recognition of the refugee crisis. It was dark, and there were so many embroidered panels, so pictures were hard and I only took some of the some of the panels I really loved, one is below.


I took my Wasatch quilt project to work on because it seemed like it would be mindless sewing since it's a log cabin construction and I used solids, and it was a great choice. I was in the afternoon classes, so we had a couple of open-sew periods before our first class, and I nearly finished my blocks during the weekend. I miscut and was 8 pieces short of one of the colors, so I couldn't finish it. But, I was so happy with my progress and was able to quickly finish the quilt after I got home. It's now at my quilter's for longarming. 


We had two instructors for the weekend: Latifah Saafir, who taught her Glare quilt, and Violet Craft, who taught us how to turn a photo into an EPP pattern. Both were so great! I got three "blocks" done for my Glare quilt, and I'm excited to jump back in this weekend to work on more. I'm a little nervous about the assembly, because she showed us briefly at the end, but it seemed a little tricky even though the curves are nice and big and gentle. I am using Tula Pink's Daydreamer line, and it feels funny to me to use a single line. I never do that! But I thought the flamingos were perfect for the centers and it just kind of snowballed from there. It's going to be a pretty bright quilt for me, but I think it'll be really pretty. 

As I've shared previously, I didn't feel comfortable participating in the Super Secret Swap just in case I wasn't up to enough awesome sewing before the event. But I did sew a swap item and Phyllis got my Luisa crossbody bag, which she loved with the focal Tula Pink print. I got a lovely pouch made my Anja. The zipper work looks so tricky and she said she struggled, but it looks like she breezed through it. The topstitching was well done, I assure you, and my girls have already tried to take it for themselves but I wouldn't let them. 


The biggest news I have to share is that I won the fabric challenge!

 For every event, Sewtopia hosts a fabric challenge, and this one was sponsored by Windham. We were sent 6 fat quarters, including three prints by Heather Ross and three solids. I brainstormed and wanted to use the stripes creatively, that was my biggest focus. I decided to make an Above the Cairns quilt, designed by Jenny Haynes, even though I haven't taken her workshop. I have taken her Hexibore workshop, and I have some of her templates, so I just went with it...I had to print the largest durkard's path template from Electric Quilt. My goal was to have the lighter peach snail print and the orange solid blend together with the striped fabric which had the peach and orange colors in it. I used the strawberry print for the centers and since they kind of resembled cobblestones, I titled it Roman Cobblestones because of the delicious strawberries we had there when we visited a few years back during strawberry season. I quilted it with my walking foot, using a design from Jacquie Gering's Walk book for the main center. Amy said my quilting was what really sealed it, and I got loads of compliments on the quilting. I felt so proud of it!


 I never quilt my own quilts, and this was really as big as I'd want to quilt myself. I got a first place ribbon, made by Megan, and a box of fat quarters of the full line of Windham solids. I'm thinking maybe I'll order Violet Craft's peacock quilt pattern and use them for that, which seems fitting.


Friday, April 5, 2024

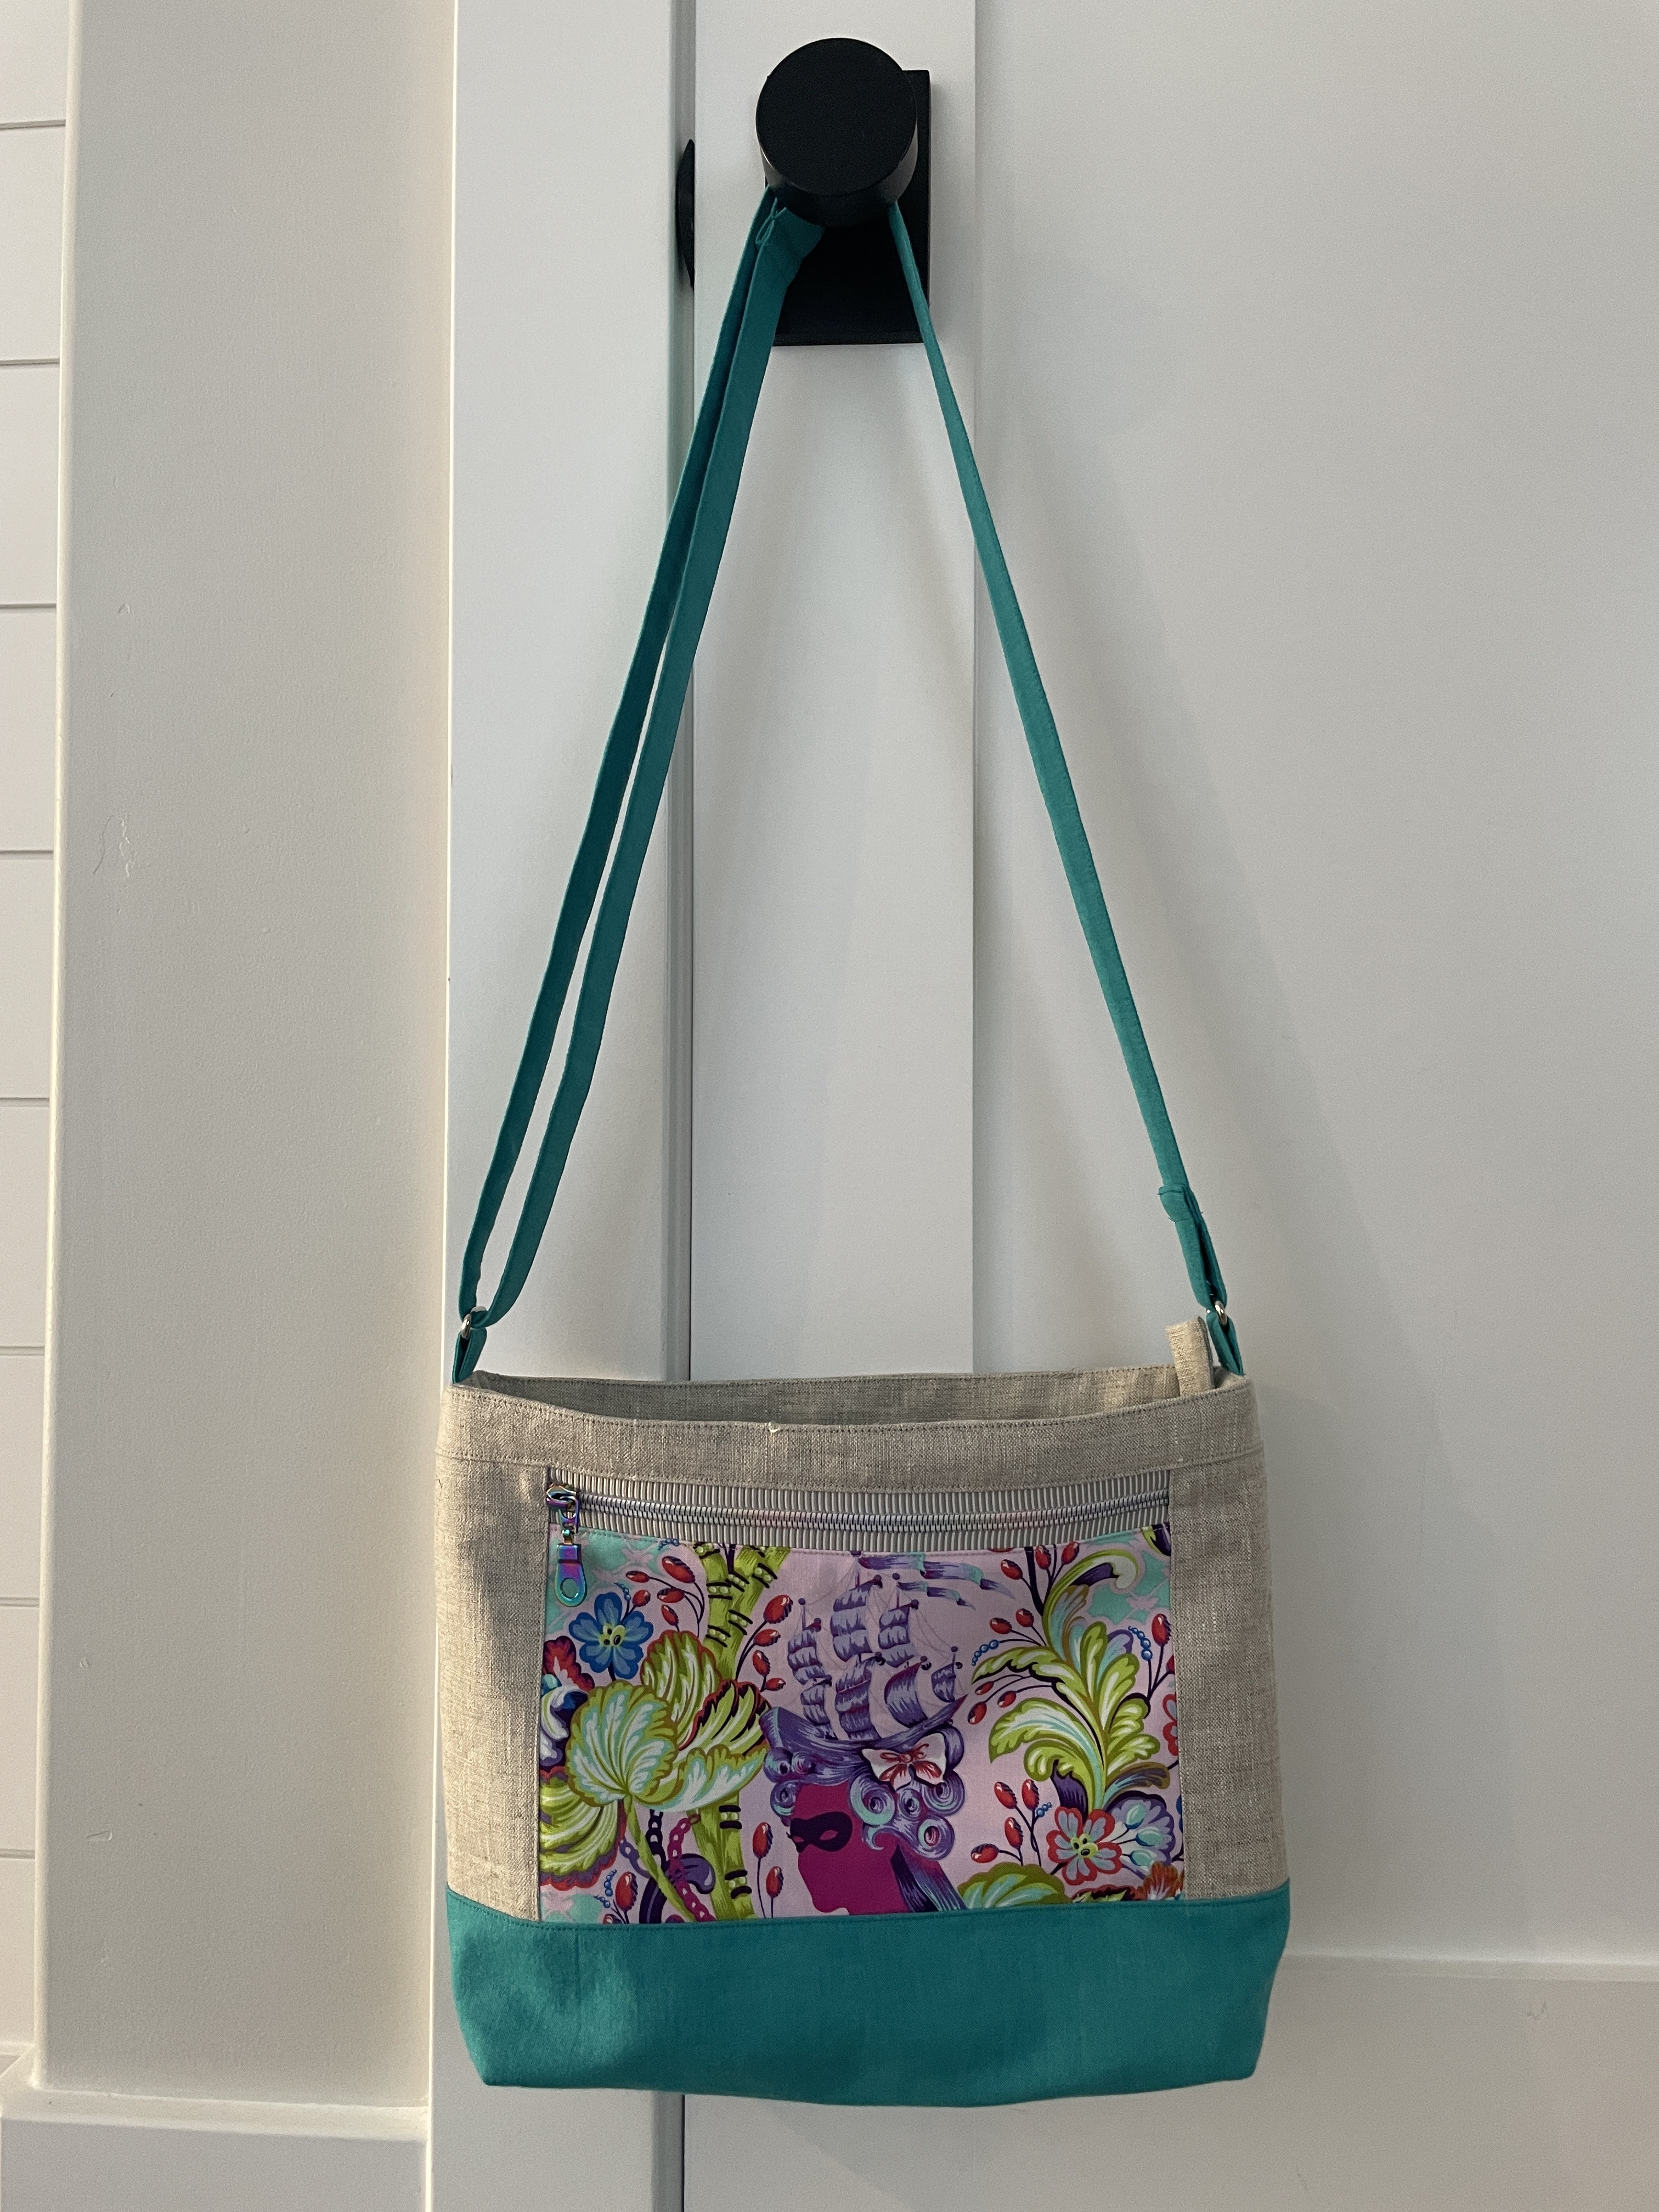
Luisa Crossbody Bag

So…I was really happy with the pouch I made for the sewtopia blind swap. I thought it turned out great and I felt like I had a good amount of extras in it. I even kinda felt like I didn’t want to give it away. 


Then, I watched the replay of the question and answer zoom call. And they talked about the swap and about the projects they were making for it…and my pouch seemed too simple. And I reread the swap instructions in the attendee packet and they have changed the wording from a small item such as a mini or pillow or pouch, to a medium item such as a tool organizer or favorite bag. 


Yeah. My pouch was not good enough. 


So, I started brainstorming because sewtopia is less than a month away now, and settled on making a Luisa crossbody bag by Sotak Handmade. I haven’t made it yet, but I thought it would be simple enough to try and would be a good pattern for a focal print. I chose a Tula Pink cameo from the Parisville deja vu line. Luckily, I found fabrics to go with it for the rest of the bag and I think it turned out great! 


I’m really pleased with how the zippers turned out. This rainbow zipper tape by the yard was an impulse purchase while I bought some other zippers by the yard on Etsy and I think it’s perfect for this bag. 


I did have to adjust how I inserted the zipper for the main compartment because I couldn’t figure out how to close it as written for a regular zipper, so I added another tab to the open end. I also think it could use a slightly wider strap, it’s a pretty big bag for only 1” wide. I also should have used a stiffer denim for the interlining, I think it’s a bit slouchy on the bottom contrast part. Otherwise, I think it’s a great bag, and once again, I’ll be sad to give it up. Hopefully the recipient loves it too, and I get something amazing myself!

Friday, March 8, 2024

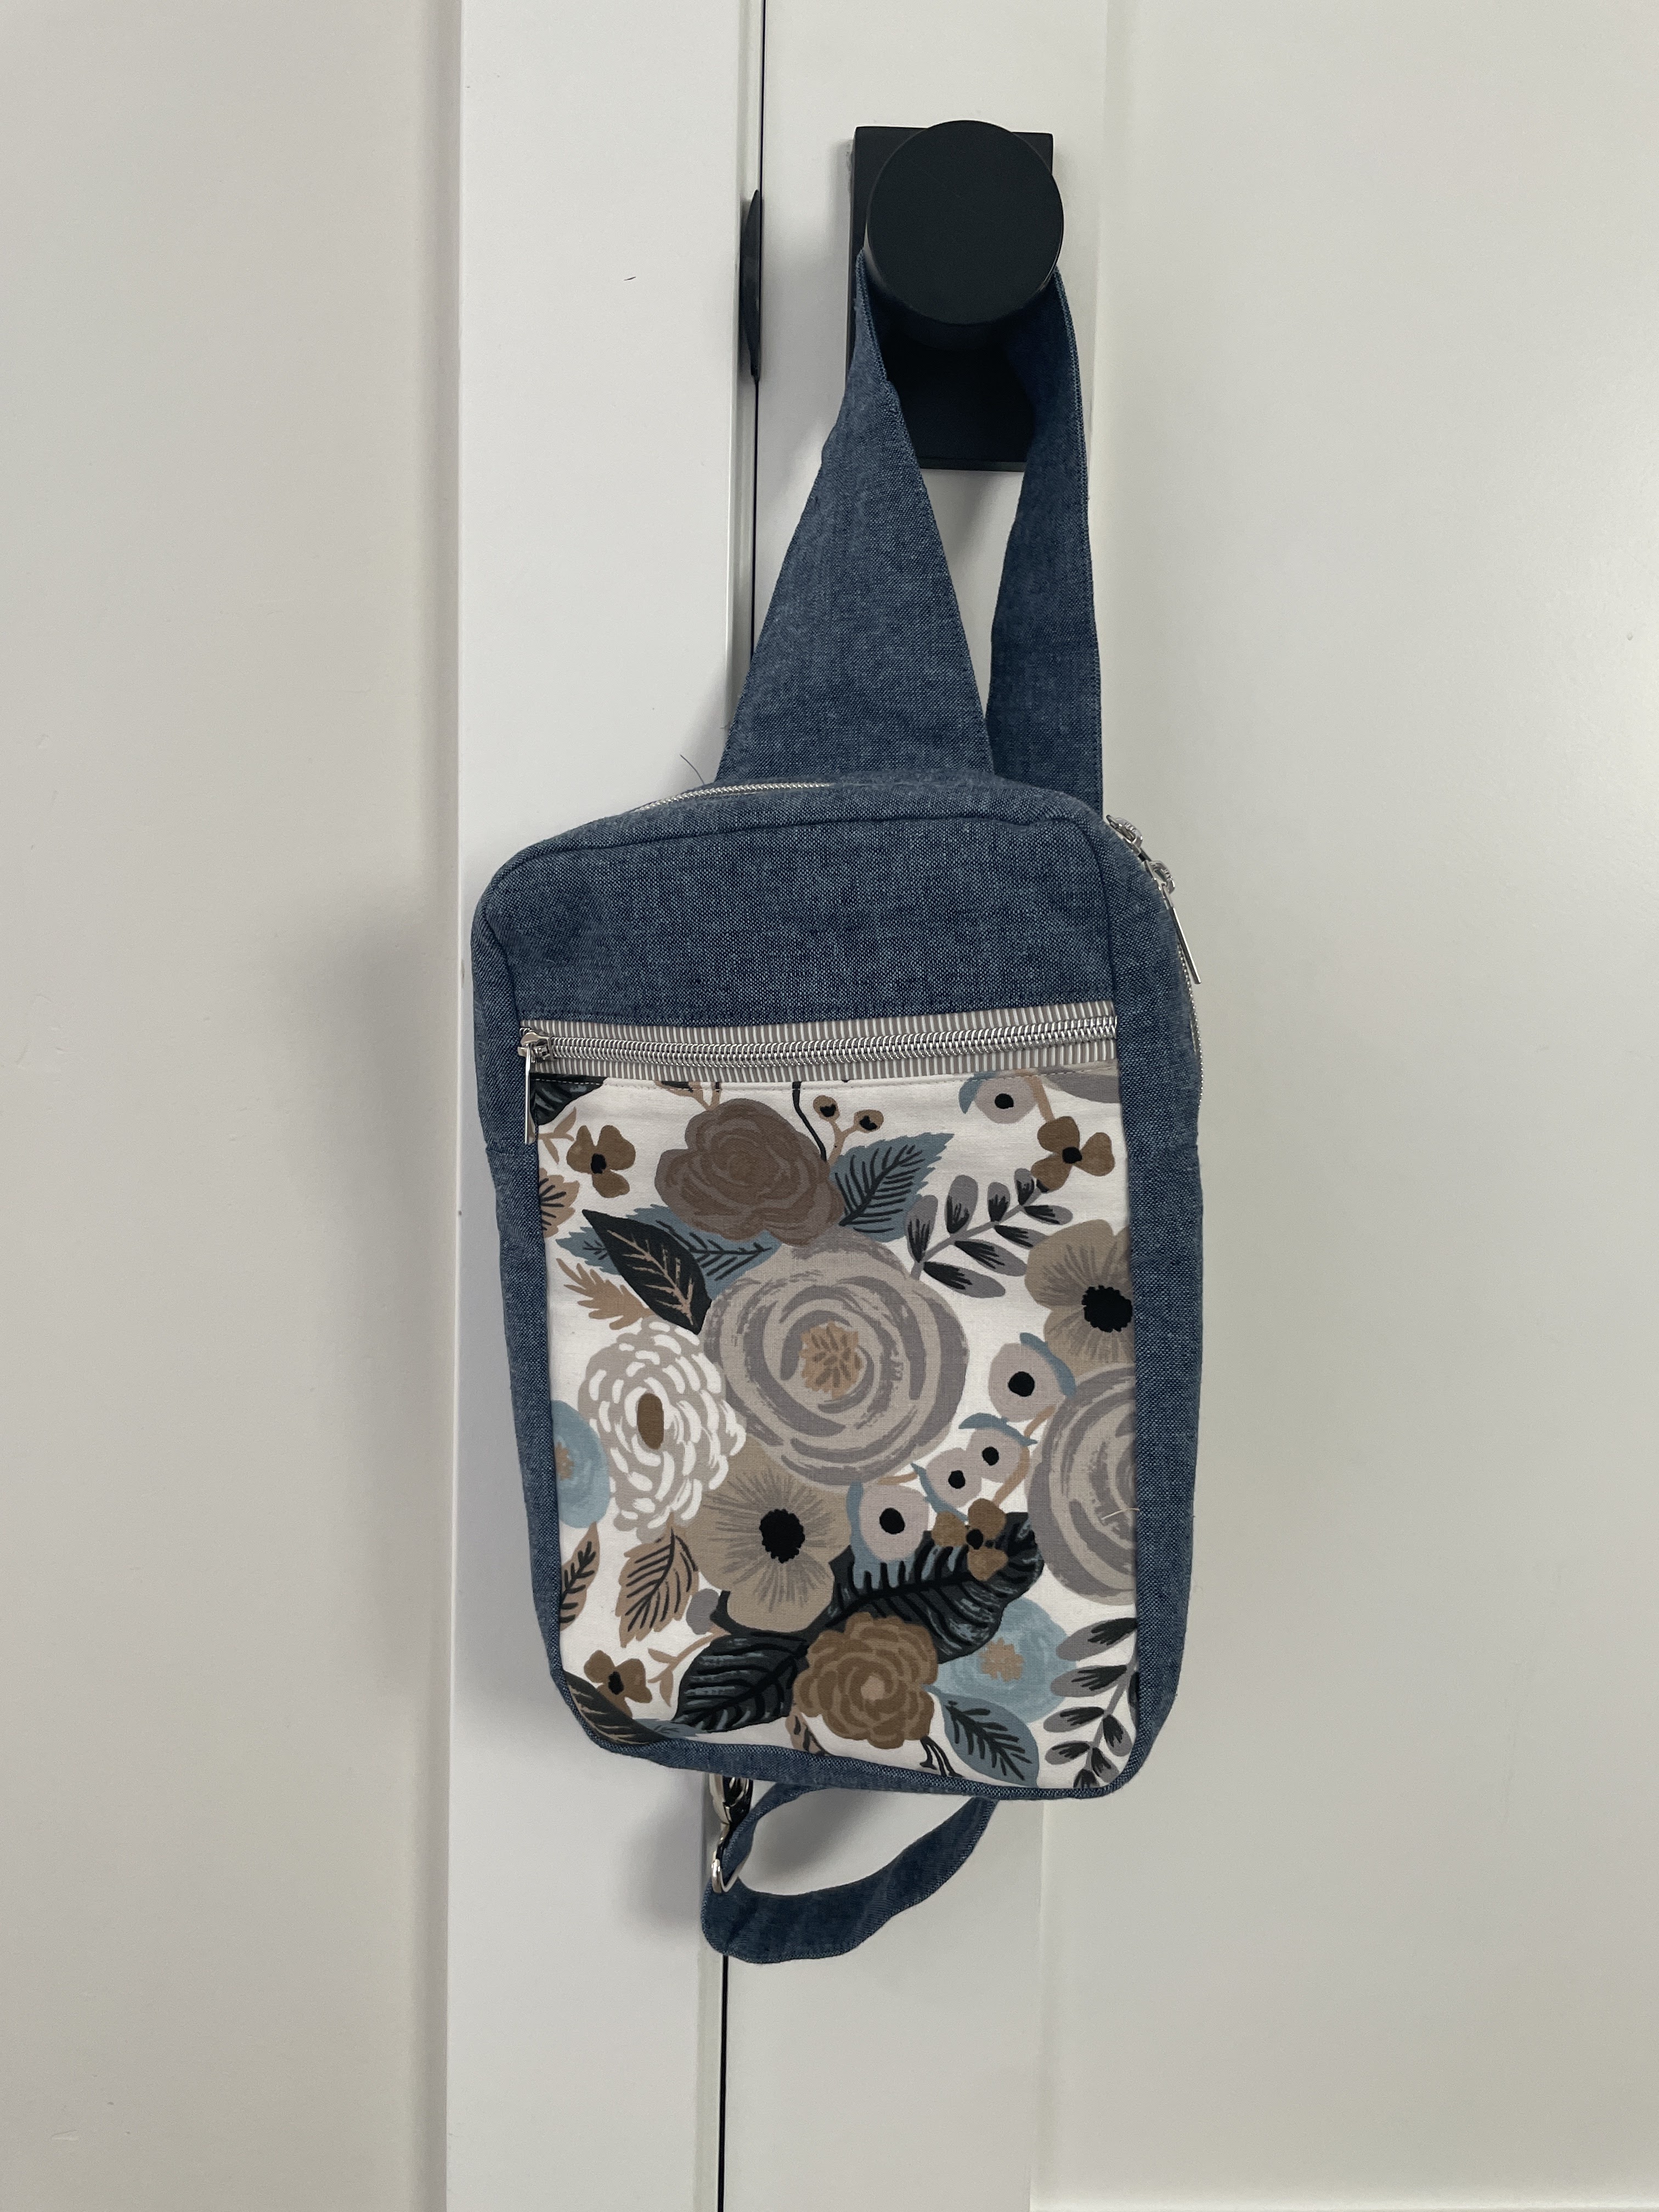
Sandhill Sling

I mentioned last time that in lieu of participating in the Super Secret Swap for Sewtopia, that I wanted to make myself a swap package, so to speak. I wanted to give myself permission to make something hard that I've wanted for a while in the pretty fabric. I intended to justify purchasing fabric if I chose, but in the end, I used fabric from my stash. I did have to buy a couple pieces of hardware, but otherwise, I had everything. I love being able to turn to my stash for most of the things I need. It's really fun to shop your stash and not be limited by what's available at the quilt shop. 


I decided that what I really wanted, what I had taken screenshots of most for a possible mosaic for the swap, was a sling bag. I purchased the Sandhill Sling pattern by Anna Graham of Noodlehead over Black Friday and settled on making it. 


Luckily, I have a nice selection of canvas in my stash, including a lot of Rifle Paper Co, and some Ruby Star. There are some really phenomenal canvas prints out there, and I settled on a floral Rifle Paper. It went great with a large scrap of Essex linen and I opted to line it with a postage stamp print by Rifle Paper, though I didn't have enough. I made the pocket out of a starry print by Rifle Paper, right? I'm pretty sure...


And, I used zipper by the yard for the first time. The pattern uses a double head zipper, and I found some YKK zippers at my favorite Etsy shop, Zipit, but then I realized that a lot of people are using zipper by the yard for their handbags because the manufacturer (not YKK...) are making nylon zippers with metallic painted teeth so you get the benefit of looking like a metal zipper without the difficulty of shortening metal zippers. I found a different seller with a nice variety and ordered a few different tapes with some pulls, but I went with the one I had originally planned, a gray and white striped tape with silver coils. I think it turned out so sharp, and I'm so glad! 


The bag went together pretty quickly and mostly easily, although I did break for a couple of weeks in the middle while I worked on the quilt top for my fabric challenge project. I managed to finish it, and the backing, and had a couple of days before I could get up to a different shop for the Aurifil thread I picked out for quilting (which I ended up going in a different direction, but that's another post...) so I finished up the bag. 

It was mostly easy until the very last finishing step, which is brilliant, in that it allows you to have a fully finished lining without binding or hand-stitching a hold closed, but it was tricky. I can't even describe it easily, but it's brilliant. I found a 505 glue stick at my local shop while I was buying batting for my challenge quilt and it helped a lot with basting for the final step. 

Now my biggest decision is whether I want to start using it now or whether I want to save it like it's a swap package for sewtopia. It's only about 5 weeks away at this point...

Monday, February 26, 2024

A Devon Pouch

I'm not a perfectionist, not really. I did tear the zipper out of the first pouch I made for the Sewtopia Swap, twice, but I'm not a perfectionist. And yes, if you were reading closely, you caught that "first" I put in front of pouch. Which strongly implies there is, in face, a second. And if you caught that, you would be right, but it doesn't make me a perfectionist, it really doesn't.

The thing is, I was just really questioning the pouch I made. It wasn't my best work. I didn't like it. I tried, and I thought I was making good choices, but it just didn't work. First, I accidentally cut the embroidered panel too narrow, so I had to make the pouch more narrow than intended. Well, the actual first was the fact that I chose the wrong color thread for the dark linen I embroidered. But, instead of redoing it at the time, like an intelligent person, I persevered. I reasoned that sometimes things don't seem like they're going to turn out until you're done and then they're fine! I reasoned that it was a gift for a random person I don't even know and it was very possible they would LOVE it. I reasoned that if I made a matching chapstick key fob, and filled the pouch with extras, it would make up for the deficiencies I saw in the pouch.

But all the reasoning I could muster couldn't change the fact that I did not like the pouch I had made and I felt badly giving something I did not like in a swap. 

So, I made a new one.


Pouches really don't take all that long, I probably spent more time talking myself out of making another one than I did actually making another one. 

I tried to do better work on this one. I added tabs to the zippers on the top. I used good fabric (even though it was all scraps). I did all the right things. 

And I love how it turned out. If you did a blind swap right, you shouldn't want to give away what you make, and that's exactly how I feel right now. 

I have to keep telling myself, I can make another one. I can make another one 

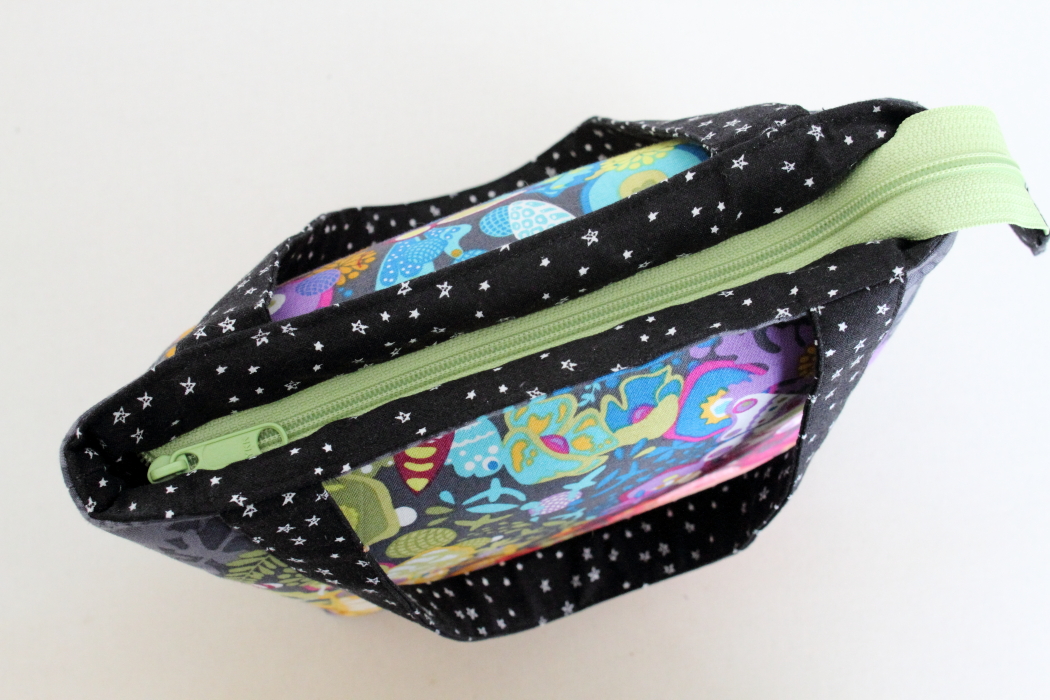
I used the Devon Pouch pattern by Sotak Handmade and it went much better than the pyramid pouches. I used a Rifle Paper Co print for the focal fabric on the front, a natural linen for the exterior, and blossom fabric from Riley Blake in green for the interior. I have more of all of it, so I really can make another one if I feel so inclined. 

I'm so glad I went ahead and did it.

And now, I'm starting work on my Super Secret Swap project. 

Spoiler: I decided to make MYSELF a super secret swap project 😂

I was going to sign up, because I want to fully participate in Sewtopia. BUT, I decided that instead, I'd just make exactly what I wanted for myself. So I'm making a Sandhill Sling and I'm using the good fabric, including a floral canvas by Rifle Paper Co for the focal print on the front and a cute stamp print from the Bon Voyage line by Rifle Paper for the interior. It's going to be GREAT. And I'm going to buy myself the treats I would want as extras and take them for myself. Yes, it's fun to get surprises picked especially for you. But I wasn't sure if I'd be up to it enough when sign ups happened, and I didn't dare sign up. Of course, I'm doing loads better now, but I didn't want to risk disappointing someone else. Plus, when I looked through past hashtags, people have gone NUTS on their packages and I didn't want to spend $50+ on extras alone. 

So, I'm making a swap package for myself. :) I think it's brilliant. 


I'm in the first prep stage and I always remember at times like this how much I hate interfacing. It's my least favorite part of sewing bags. But, it gives good structure, sigh. Hopefully I'll have a finished bag to show off before too long!

Tuesday, June 27, 2023

A New Two Zip Hipster

I wasn't planning on making any bags anytime soon. Bags aren't always my favorite thing to sew; any bag worth it's salt (well, most of them, anyway...) has a zipper and other hardware. I have a lot of zippers and hardware in my stash because I'm picky about them and buy extras whenever I need to buy some to maximize shipping and to make sure I can sew when I want without waiting for hardware. Plus, I tend to make the same patterns, or similar enough patterns, that I know what sizes of hardware I need. I buy my hardware on Etsy from Bag Maker Supply, who has a great selection, great quality, and good pricing. They have really professional looking stuff that makes bags shine. Anyway, the point is, sewing zippers and hardware aren't my favorite part. And, some parts of bags get awfully thick with layers of fabric and interfacing (also not my favorite...).

So, I wasn't planning on making any bags anytime soon. But, I switched out one day to my two zip hipster which I don't use very often because the linen I used is starting to wear on the top (grr...) and I remembered how much I love that size and style. And, then I saw an instagram post (can't remember who, sorry...) and they used a pair of worn out jeans to make a bag. But the real kicker was a few days later when my husband needed to discard a pair of dockers he'd worn holes in. We were rounding up bags of worn clothes to recycle at H&M, and I pulled them out, remembering the IG post. 

I still didn't have any intention of making a bag anytime soon, but then I found myself between projects. I'd finished my trip sewing, and I was waiting for an order of fabric before I washed a bunch for a quilt project. But I didn't want to just...not sew. So I decided a new two zip hipster from old, worn out dockers was just the ticket.


This is the leftover fabric after I harvested all the usable fabric...plus the zip and the buttons which I'll save for other potential projects.


And it was. I opted to use some of a hoarded Alison Glass panel for the front focal print, and then I used Alison Glass fabric I had for the interior as well. I had a hard time deciding on a lining fabric because I sort of wanted to use the pink floral that I used for the interior pocket for the whole interior, but I have already used it as a lining in a bag. The turquoise works great, too, and I really love how it turned out. I think the yellow zips are great, and I think overall, the bag turned out better than I expected. I'm really excited to start using it, and I hope it will be more durable than my beautiful linen one that I'm trying to not overuse. 

The two zip hipster pattern is by Dog Under My Desk and I absolutely love her patterns. They're more like tutorials with all the photos and detailed instructions, they're well-tested, functional, and she takes care to minimize bulk. I highly recommend her patterns. The only change I made was to NOT add as much interfacing. I did not interface the twill fabric, since it's pretty thick as it is (at least where it's not worn thin from years of wear...). I think that's it. I did use the sew in interfacing, because even though it's thick fabric, it's surprisingly flexible. Or whatever the right word is. I wanted just a bit more structure. I'm pleased with the end result, so I think I made the right call. I was really worried about the strap being too thick if I interfaced it, and I think it's just right. 


Tuesday, June 20, 2023

Travel Pouches

I always think I can just whip up a pouch and it will be totally fine. And when I'm not careful, I'm inevitably disappointed. They are simple, but they do require a bit of care and finesse. Case in point, one of my twins wanted to make something for my sister, just randomly. I figured I'd made enough pouches to help her through it without re-reading instructions, and we just went for it, using the zipper length as a guide for how big to cut the fabric. 

I neglected to topstitch the fabric next to the zipper, though, so it tends to get stuck...

See, just a bit of care. 

The other day, I had an idea for a travel solution. I want to take a some loose silverware on our trip. We'll be doing some picnicking, I'm sure, since it'll be easier with kids, but also we'll be buying plenty of pastries and I'd love to enable sharing by taking a butter knife. I looked at travel sets, but the knives look pathetic, and I realized that they're just smaller utensils in a zippered pouch, often made of silicone or similar. I realized I could easily make a pouch, and I have some oilcloth, and then use some old silverware.

I couldn't find my old silverware, but I was able to buy some really inexpensive silverware from Wal-Mart. We're talking 3 knives for $1.25. Cheap.

But I was nervous about making the pouches because I needed them short and long. And I didn't have a pattern for it specifically...and oilcloth is trickier than quilting cotton...


I measured the knife, and then used Sotak's Essential Pouch for loose directions. I didn't make a contrasting bottom panel, and just went for it. 


The first one turned out okay, but not great. I used a metal zipper, which I think look so great generally, but it was obviously an exact length and I think would have been better 1/2" longer. The second one I used a regular wide purse zipper, and I also made the boxed corners just a tad smaller. I think it turned out better. And now we have two, one for gluten free silverware, and one for non-GF silverware. Obviously, utensils can be washed, but they'll go in the pouch unwashed after use, which would contaminate the pouch. So, two.

I also tried to make a small coin purse. I found a great yoga style security waistband that you wear under your clothing, and I thought it would be more secure to keep credit cards in a pouch that would be less likely to fall out. It's pretty secure, but I haven't used it yet, and I can just see a slim credit card getting pulled out by mistake and misplaced, which is the exact opposite point of the waistband. So I used a tutorial from Sotak Handmade for a small coin purse. I found some coordinating scraps and it went together really quickly.


The only hiccup was the very end when I turned it out and needed to sew the opening closed. She had you baste the inside panel all the way around and then add the exterior panel and leave an opening for turning. I didn't see any point in basting, so I just went for it, but that meant both the interior and exterior had holes  that needed to be closed. But what really didn't make sense to me in reflecting is that she had the hole to turn on the exterior. I think it would make more sense to have it on the interior. If I make another one, I'd try that.

It's also a tad small for a credit card...but it's nice that it's so small, I guess? I am undecided on whether I'll take it or not. Or make a slightly larger one. *shrug* I am very worried about pickpockets this trip; Europe is reportedly more crowded than ever before, and I'll have four children I'll be trying to keep track of and manage. I'll be pretty distracted, which makes for a prime pickpocket target. So I want to protect myself as much as I can. We'll see! 

Friday, January 5, 2018

Scripture Tote

My oldest daughter turned eight the first week in January. First of all, I can't believe that I have an eight-year-old! Second, eight is a really big birthday for Mormons. Eight-year-olds are eligible to be baptized, which is pretty exciting! Like many other families do for their eight-year-olds upon their baptisms, we gave her her first set of real scriptures (as opposed to cheap paperbacks) and I really wanted to make her a scripture tote for them.


A few years back when our oldest niece was baptized, I made her a simple tote bag, but I wanted something a little more structured this time. I have more experience with bags now, and I just wanted something a little more finished.


I turned, naturally, to my favorite bag designer, Dog Under My Desk. She has a quick zip lunch tote that looked perfect! She recently released an updated version of the pattern including two sizes. I let my daughter pick the fabric, though I pointed out an Alison Glass Ex-Libris panel that I thought she'd love.


(Don't worry; she vetoed several of my suggestions...I may have shown her this panel but I didn't force anything on her) She picked out a black fabric to go with it. and luckily I had a green zipper that is a pretty great match for the panel.


This pattern was great, and so quick. I made a couple of changes; I used fusible fleece instead of insulated batting (obviously, there was no need for insulated batting, and it's so loud) and I also added a piece of Peltex in the bottom to add structure to support the scriptures (which are not light...). I added it after the fact, because I felt the bag sagged under the weight. But with the way the bag was sewn together, it was easily added after--I just had to rip out the last seam and slip it in, and stitch it back up.


Anyway, the bag is a perfect fit for the scriptures, and the panel turned out to be the perfect size for the front. I really think she'll love it.

Sunday, July 30, 2017

Odile's Bag

I have to admit, I feel really cool when I get to announce that I have a French friend. I mean, how many people have international pals? Okay, okay, a lot...but I still feel pretty cool.

I met Odile while on a study abroad to Paris with my university. My university contracted with a local housing company to place students with host families, and Odile happened to rent a room from the same woman I was placed with. At the time, she didn't speak English, and I spoke French very poorly, but we still became friends and have stayed in touch over the past 14 years. I can't believe it's been that long! Wow. We've seen each other a few times since then, I've been back to Paris twice (and last time, she took me down to her family's home in Lyon) and she's been to the US once.


So, it had been a couple of months since I'd heard from her, and I just wondered how she was doing. While I was thinking about her, I decided that I wanted to send her a package. Because who doesn't love getting mail? And mail is even better if it has something exciting inside. But, shipping to France is decidedly not cheap, of course, and so I set out to come up with a gift that would be worth the postage, and decided to sew her something. Now, as any sewist knows, the problem with sewn gifts is that people who don't sew rarely appreciate the work (or the item) and people who do sew may appreciate it, but don't really need you to sew them anything. So, Odile is not a sewist, so I wanted to come up with an idea that anyone would love. I settled on a bag, but I wanted to make sure it was stylish and not cute in the quilters' idea of cute. Does that make sense?


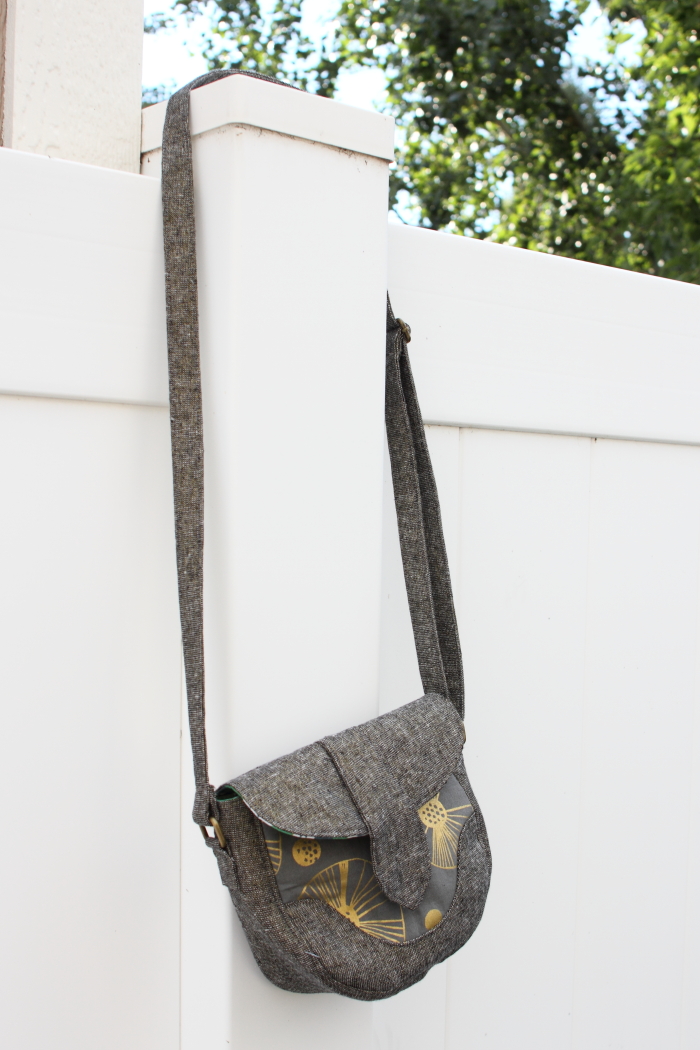
I picked a smallish bag so I would be able to fit it in a small box for shipping, and the pattern is a free pattern from Swoon Patterns. I had made a free Swoon pattern before, and knew the patterns were well written. For the record, I was willing to pay for a pattern, but the Dollie Mini Crossbody was perfect for what I wanted.

This is the back of the bag and it's a pocket.

I started searching for fabrics to use, and found this awesome Cotton and Steel gray with metallic gold print. And I knew it was perfect--it's modern, and fresh, and not quilty. I wanted to use a linen for the main fabric, and had considered a camel/khaki color, but the awesome folks at Hawthorne Threads helped me out with fabric matching and suggested this Essex linen in black with gold metallic thread. It is perfect! I love how it turned out. I also found some Joel Dewberry fabric in green (her favorite colors are green and yellow) and I think it works really well to add a fun element while still being stylish.


I made one change to the pattern to add an interior pocket. I originally planned to stitch down the middle of the pocket to create two pockets but opted against it because the bag is pretty small to start with, about 6-1/2" wide.


Since the fabric had gold metallic in it, I knew I couldn't use my standard chrome hardware and ordered antique brass hardware from Bagmaker Supply on Etsy. They have a good selection, good pricing, and fast shipping!


I really love how it turned out. The magnet is a little strong for the bag, and kinda pulls on the front of the bag when you try to open it, and the flap is a little stiffer due to the heavier linen, so I'm hoping it relaxes a little with use. But I also assume that once it is full of stuff, it'll hold its shape a little better, too! And really, I just hope Odile loves it. She's been a great friend over the years and I hope she enjoys it.

Wednesday, October 14, 2015

Everyday Zip (Pattern Review)

If you've been following my Instagram feed, you know I'm involved in the Around the World Craft Swap. It's my first swap ever, and while I wish it were sewing specific, I'm pleased to be involved in a travel-related swap. I love traveling!


I made what my partner really asked for, but the designs haven't taken that much effort, and I felt like I wanted to include another small sewn item. She did say that she'd love something useful, and I thought I'd try a zippy pouch! I've never made one, but I found this cute Everyday Zip pattern by Fig Tree and Co. at a local shop and thought it'd be perfect. Simple, but a little fancied up with the prairie points and focal fabric.


I opted to skip the canvas and use regular cotton, and I used the same cotton for the lining as the main bag. I pulled this cute Paris print from my stash and found a number of 2" squares that matched perfectly. They are all from the Hometown line by Sweetwater.

I got everything cut out and sewed it up at my neighborhood sewing retreat!

So, here are my thoughts on the pattern.

I do think it's adorable. I like the boxed corners and that it incorporates a strip of focal fabric and prairie points. It's a great way to show off fun prints. The zipper went in really easily, and with the way it's constructed, the zipper ends lay flat (no ugly pinches!). It's also a great size.


I did have some problems, though.

First, I read through it several times and really struggled to understand what I was supposed to do before I started. I'd hoped it'd make more sense while I was sewing. I chose to make the smallest coin purse size, and the instructions are different because it doesn't have a front zipper. The problem is, she doesn't make it clear where you are supposed to start sewing for that pouch, as the first several steps are all for the front zipper panel used in the other two pouches. I appreciate that she's included a variety of sizes and styles in one pattern, but she didn't execute the pattern in a way that makes it easy to make them. In addition to the difficulty in figuring out where to start the coin purse, the other differences are explained on the last page at the very end of the pattern. It's not easy to pair those noted differences with the actual steps and I actually missed the note to shorten the wrist strap. I wish instead the pattern had included parenthetical notes in the steps with the changes.

Second, she constructed the pouches in such a way that the seam is inside the pouch, not enclosed between the lining and the exterior. She instructs you to zigzag the edge to finish it, so clearly this is what she intends, but it seems a little unfinished to me, especially since I expected the lining to be "finished." And, I used a contrasting thread because I was too lazy to change it and I was sure it was going to wind up hidden. It's not a bad contrast (it matches the focal fabric...) but still. I would have used a matching thread, which I had with me, if I'd known. I have a really hard time visualizing patterns as I read through them, so pre-reading didn't help me.


Overall, the pattern was difficult for me to follow and took twice as long as it should have given the simplicity of the item. Now that I've done it once, I'm sure it would go together much easier in the future, but with the exposed seams, I'm not sure I'll make it again as is. I'm really disappointed in the exposed seams, and I'll probably try to figure out a way to incorporate the focal fabric and prairie points into a pouch with a finished lining. I'd rather have a bottom seam with all the seams hidden than exposed side seams.

I would not recommend this pattern to a friend, and wished I'd purchased a different pattern. And that's okay--I'm embracing the idea that you never know until you try. :-)