Monday, March 18, 2024

Gratitude Quilt

Before Thanksgiving, I had an idea. I had just seen a blogpost by Amy Smart about her gratitude quilt, and it lit a fire in me. The wheels turned quickly, and even though I usually mull things way longer than is necessary, I quickly jumped to work. I pitched it to my kids and they liked the idea too, so we went for it! 

I largely used Amy Smart's pattern for the gratitude quilt, but I made some changes. I think I made more blocks, but I omitted the border. And instead of using a sharpie to write on the blocks, I opted to embroider them. I had my girls all come up with 10 things they were thankful for and then I color coded the blocks and had the girls all sew their own blocks. So, my oldest daughter's blocks are all the same yellow fabric, and my second daughter's are all the same blue. I added their name to one of their blocks so we'd be able to figure it out easily later.


My girls have a whole week off of school for Thanksgiving and we never travel, so this was a great activity for them while they were off of school. I did need to unpick and resew a few blocks, especially for my seven-year-olds, but they mostly did great. And I sewed all my husband's blocks, of course. 

Once they were done, I laid it out quickly and stitched the rows together, and then I had a stroke. I knew it wouldn't be done by Thanksgiving, since we were sewing the blocks the day before Thanksgiving, but I still hoped to finish it before the end of the year just to wrap it up.

That did not happen. But I got it up to my quilter in February (I couldn't easily get down on the floor to pin rows together after I was discharged because I was so stiff), and I got it back this week.

I put it aside while I worked on my Sewtopia challenge quilt (will post on that later!), but once I had sewn the binding down to the front of that quilt, I opted to bind this one. I used the brown fabric that I used for some blocks, and I don't love the print (it was free from a neighbor's destash) but it's a great color, especially for an autumn quilt. I think it's a great binding for this quilt. 

I'm so glad it's finished!

Friday, March 8, 2024

Sandhill Sling

I mentioned last time that in lieu of participating in the Super Secret Swap for Sewtopia, that I wanted to make myself a swap package, so to speak. I wanted to give myself permission to make something hard that I've wanted for a while in the pretty fabric. I intended to justify purchasing fabric if I chose, but in the end, I used fabric from my stash. I did have to buy a couple pieces of hardware, but otherwise, I had everything. I love being able to turn to my stash for most of the things I need. It's really fun to shop your stash and not be limited by what's available at the quilt shop. 


I decided that what I really wanted, what I had taken screenshots of most for a possible mosaic for the swap, was a sling bag. I purchased the Sandhill Sling pattern by Anna Graham of Noodlehead over Black Friday and settled on making it. 


Luckily, I have a nice selection of canvas in my stash, including a lot of Rifle Paper Co, and some Ruby Star. There are some really phenomenal canvas prints out there, and I settled on a floral Rifle Paper. It went great with a large scrap of Essex linen and I opted to line it with a postage stamp print by Rifle Paper, though I didn't have enough. I made the pocket out of a starry print by Rifle Paper, right? I'm pretty sure...


And, I used zipper by the yard for the first time. The pattern uses a double head zipper, and I found some YKK zippers at my favorite Etsy shop, Zipit, but then I realized that a lot of people are using zipper by the yard for their handbags because the manufacturer (not YKK...) are making nylon zippers with metallic painted teeth so you get the benefit of looking like a metal zipper without the difficulty of shortening metal zippers. I found a different seller with a nice variety and ordered a few different tapes with some pulls, but I went with the one I had originally planned, a gray and white striped tape with silver coils. I think it turned out so sharp, and I'm so glad! 


The bag went together pretty quickly and mostly easily, although I did break for a couple of weeks in the middle while I worked on the quilt top for my fabric challenge project. I managed to finish it, and the backing, and had a couple of days before I could get up to a different shop for the Aurifil thread I picked out for quilting (which I ended up going in a different direction, but that's another post...) so I finished up the bag. 

It was mostly easy until the very last finishing step, which is brilliant, in that it allows you to have a fully finished lining without binding or hand-stitching a hold closed, but it was tricky. I can't even describe it easily, but it's brilliant. I found a 505 glue stick at my local shop while I was buying batting for my challenge quilt and it helped a lot with basting for the final step. 

Now my biggest decision is whether I want to start using it now or whether I want to save it like it's a swap package for sewtopia. It's only about 5 weeks away at this point...

Monday, February 26, 2024

A Devon Pouch

I'm not a perfectionist, not really. I did tear the zipper out of the first pouch I made for the Sewtopia Swap, twice, but I'm not a perfectionist. And yes, if you were reading closely, you caught that "first" I put in front of pouch. Which strongly implies there is, in face, a second. And if you caught that, you would be right, but it doesn't make me a perfectionist, it really doesn't.

The thing is, I was just really questioning the pouch I made. It wasn't my best work. I didn't like it. I tried, and I thought I was making good choices, but it just didn't work. First, I accidentally cut the embroidered panel too narrow, so I had to make the pouch more narrow than intended. Well, the actual first was the fact that I chose the wrong color thread for the dark linen I embroidered. But, instead of redoing it at the time, like an intelligent person, I persevered. I reasoned that sometimes things don't seem like they're going to turn out until you're done and then they're fine! I reasoned that it was a gift for a random person I don't even know and it was very possible they would LOVE it. I reasoned that if I made a matching chapstick key fob, and filled the pouch with extras, it would make up for the deficiencies I saw in the pouch.

But all the reasoning I could muster couldn't change the fact that I did not like the pouch I had made and I felt badly giving something I did not like in a swap. 

So, I made a new one.


Pouches really don't take all that long, I probably spent more time talking myself out of making another one than I did actually making another one. 

I tried to do better work on this one. I added tabs to the zippers on the top. I used good fabric (even though it was all scraps). I did all the right things. 

And I love how it turned out. If you did a blind swap right, you shouldn't want to give away what you make, and that's exactly how I feel right now. 

I have to keep telling myself, I can make another one. I can make another one 

I used the Devon Pouch pattern by Sotak Handmade and it went much better than the pyramid pouches. I used a Rifle Paper Co print for the focal fabric on the front, a natural linen for the exterior, and blossom fabric from Riley Blake in green for the interior. I have more of all of it, so I really can make another one if I feel so inclined. 

I'm so glad I went ahead and did it.

And now, I'm starting work on my Super Secret Swap project. 

Spoiler: I decided to make MYSELF a super secret swap project 😂

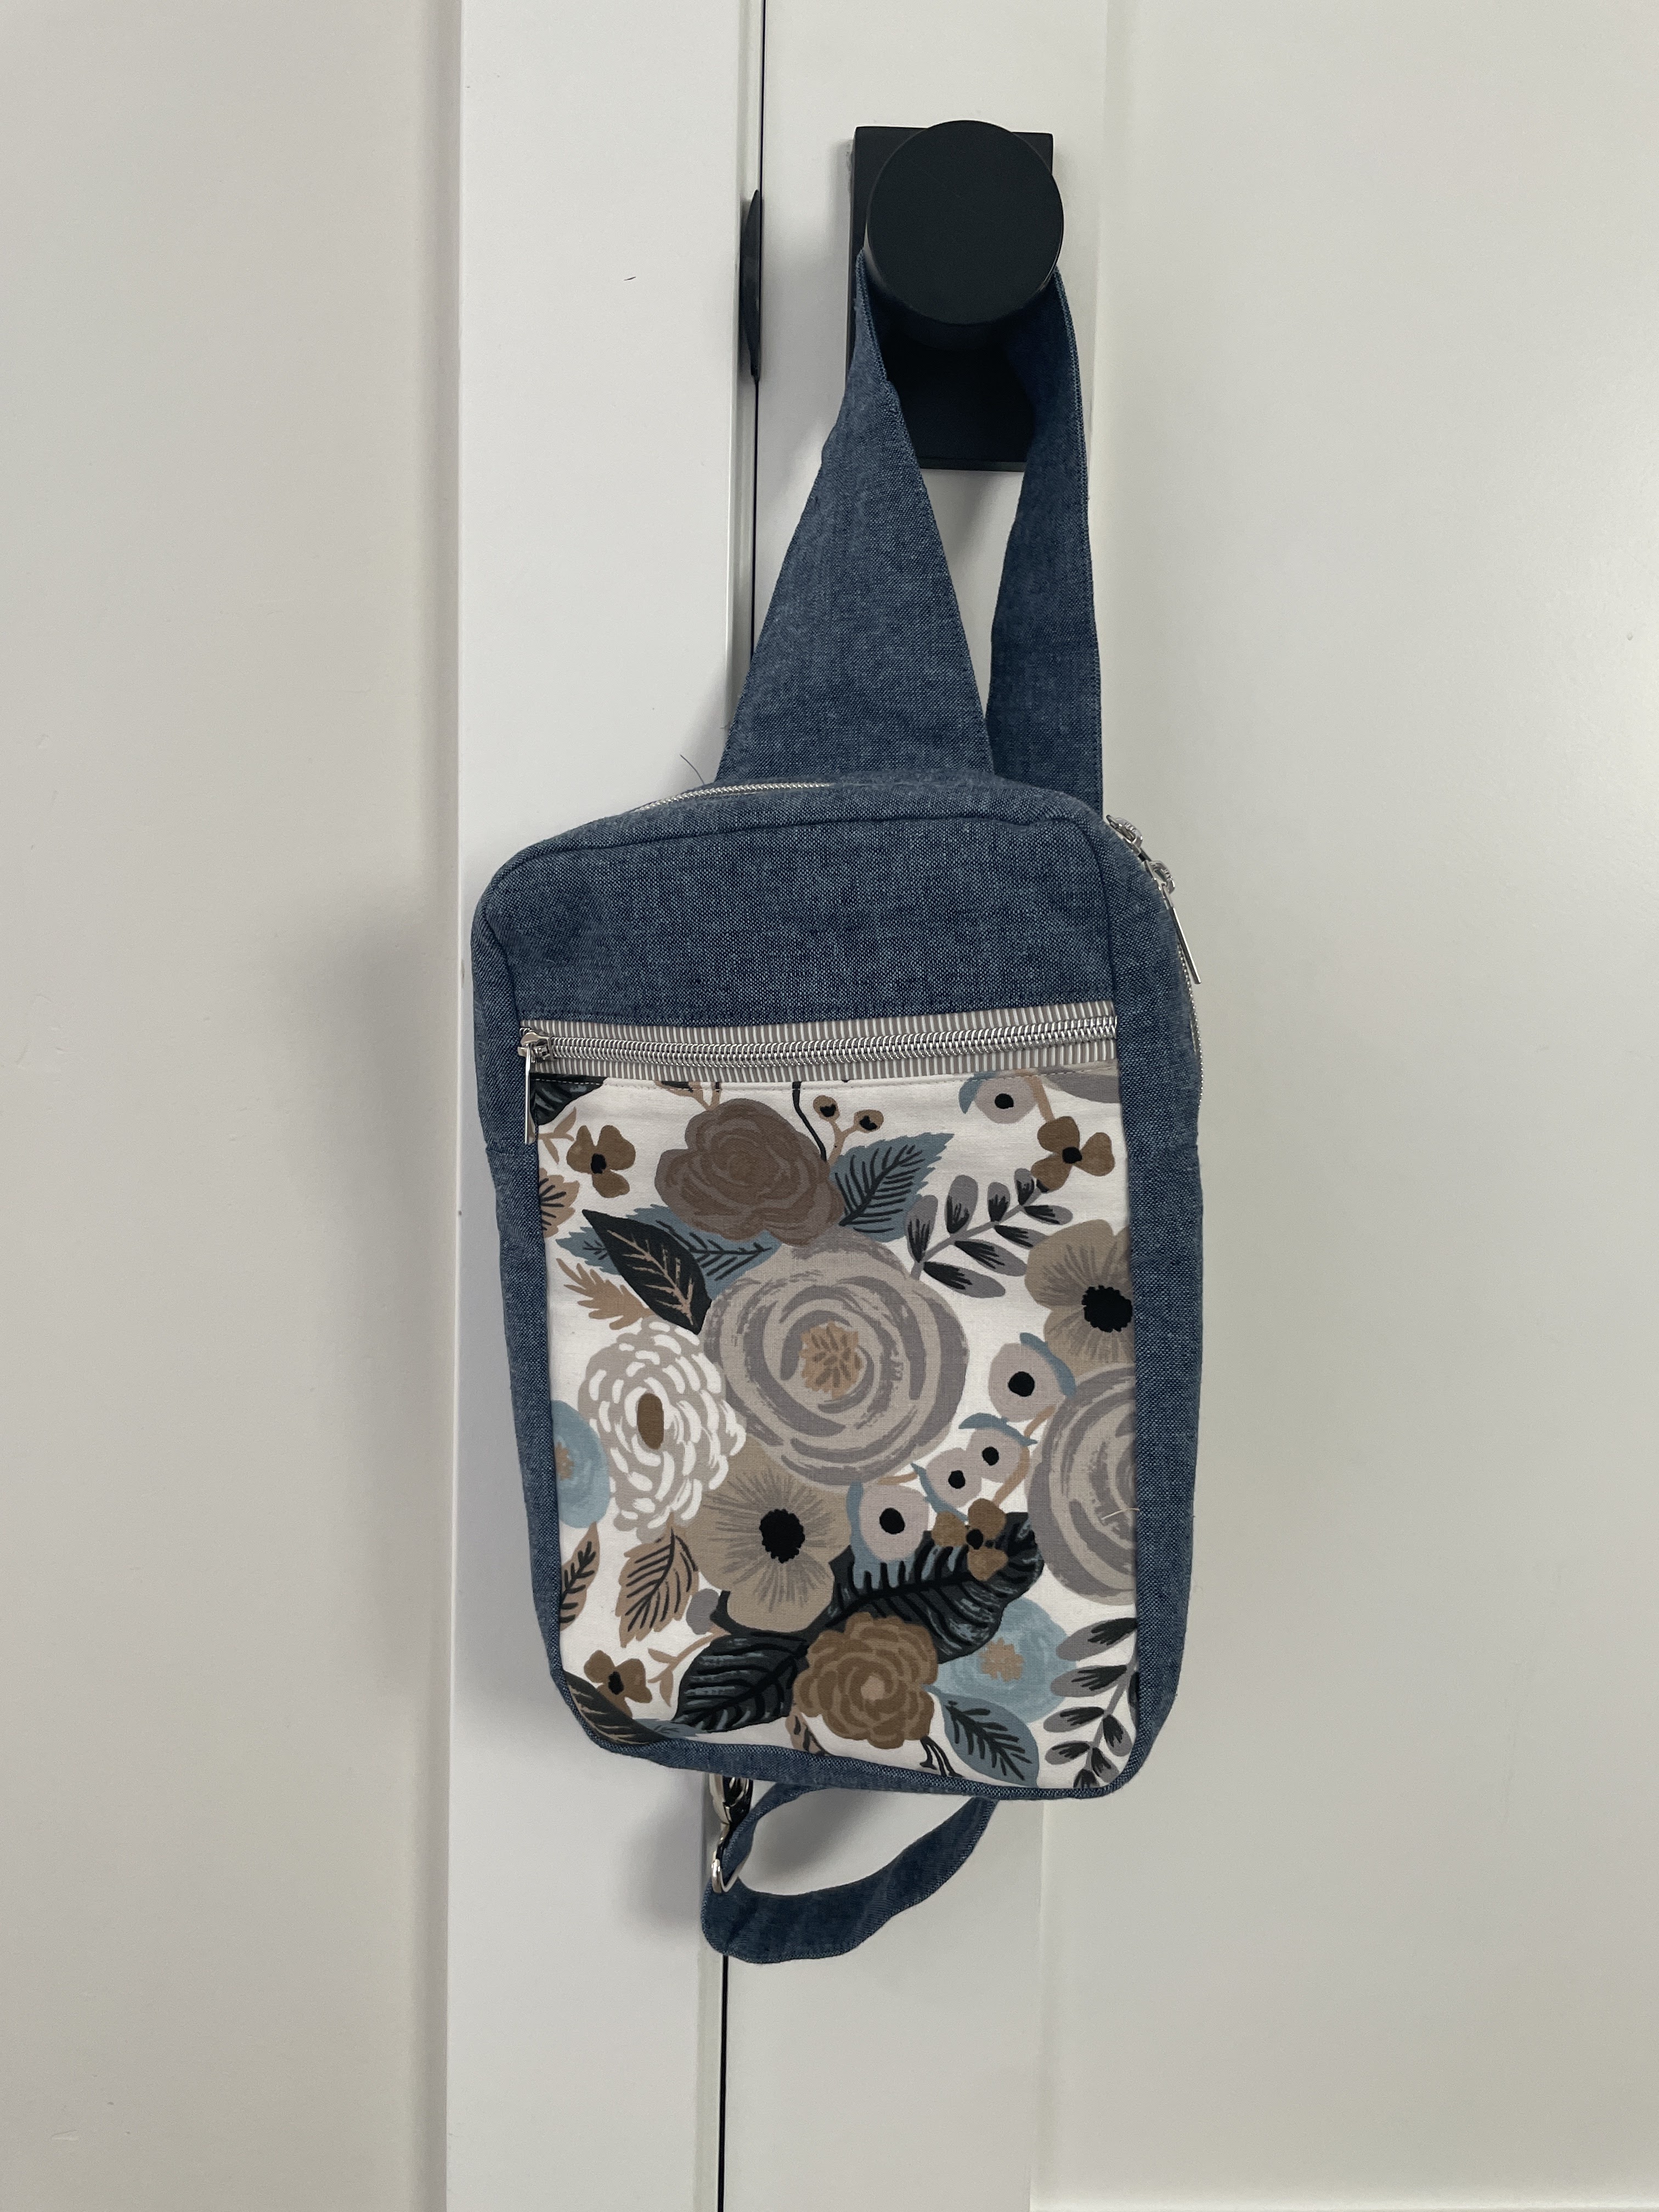
I was going to sign up, because I want to fully participate in Sewtopia. BUT, I decided that instead, I'd just make exactly what I wanted for myself. So I'm making a Sandhill Sling and I'm using the good fabric, including a floral canvas by Rifle Paper Co for the focal print on the front and a cute stamp print from the Bon Voyage line by Rifle Paper for the interior. It's going to be GREAT. And I'm going to buy myself the treats I would want as extras and take them for myself. Yes, it's fun to get surprises picked especially for you. But I wasn't sure if I'd be up to it enough when sign ups happened, and I didn't dare sign up. Of course, I'm doing loads better now, but I didn't want to risk disappointing someone else. Plus, when I looked through past hashtags, people have gone NUTS on their packages and I didn't want to spend $50+ on extras alone. 

So, I'm making a swap package for myself. :) I think it's brilliant. 


I'm in the first prep stage and I always remember at times like this how much I hate interfacing. It's my least favorite part of sewing bags. But, it gives good structure, sigh. Hopefully I'll have a finished bag to show off before too long!

Monday, February 19, 2024

Mid-February Already?!

I don't have any big quilts to post but I have finished a few things, and I'm expecting a couple quilts back from the quilter soon. I have one at my custom quilter's, and she texted a week ago that she was getting started on mine, which is exciting! And I have one at my regular quilter, that is waiting in line for an edge-to-edge. I also have a finished top that I need to decide what to do with; do I want custom quilting, or just a regular panto? Decisions...

Other things I've been working on are pouches for Sewtopia and belated teacher Christmas gifts, which I'm helping my girls sew and which are not done, yet. They are now cut out and pinned, but getting girls to sew when they don't want to is hard. 

I am really excited for Sewtopia, even though I'm going alone...I keep crossing my fingers my friend will get a ticket, but so far she hasn't had any luck on the waitlist. :( I want to participate in the Sewtopia Swap, and I thought it would also be nice to make little pouches for my tablemates, since I don't know anyone...so I've got those done. 

This is the pouch I made for the anonymous swap. It didn't turn out as great as I'd hoped; I used the zipper I had that I thought matched the best among my stash, but it's too light, and the fabric I embroidered on is too dark for the thread I chose. I did use a cool Tula print for the lining, the same one I used to make a chapstick key fob. I hope it's good enough even though it didn't turn out like I'd hoped; I'm finding I'm having a hard time judging because it's different than my expectations.


And these are the pouches I made for my tablemates. I tried the large one first, because I wasn't sure how large it would really be, but it was too big, in my opinion, so I made three of the smaller ones. It's a tricky pattern; I used Sotak Handmade's pattern, and I don't know if I'm doing it wrong or what, but I end up with fabric that isn't completely stitched down. It's basically enclosed, and I guess as long as you don't wash it, it'd probably be fine, but I handstitched it closed because you could also see the stitch lines for the other side through the gap it left. Shrug. It's not my favorite pattern, I'm pretty disappointed, actually. But it's okay. I got them made, and I think they're cute! The fabrics all came from scraps, so score!


We had sewing night last weekend, and I also got a bunch cut out for my Candlelight quilt, so I'm looking forward to starting to sew that. 

Friday, February 16, 2024

Fabric Friday Week 43: February 16

I'm still figuring out my next quilt and one that I've been toying with is another Candlelight quilt, designed by April Ronsenthal, but in color. She emphasizes the value gradient and that it's important to the look of the quilt, but I kind of want to try a color gradient instead. The pattern assumes you're using single cuts, and I don't have any cuts large enough for the fabric requirements, so I pulled out several pieces that are close in color to each other. I'm not sure if this will work or not, I printed out a coloring page for the pattern so I can try it out with colored pencils first. We'll see,,,I've cut it out, and I hope it turns out as pretty as I think it will!


Friday, January 26, 2024

Fabric Friday Week 43: January 26

I've been itching to plan my next project, even though I have started on my 6 petal Hexibore quilt top that I bought fabric for on Black Friday. I'm feeling better about curves, so yay! Anyway, it's a relatively quick project anyway, that I'm still searching for what my next project will be, so I started pulling fabric. Today, my color scheme is an idea for an Interwoven quilt. I saw one that was more earthy colors and loved that it was different than most of the quilts in the feed, so I went that direction.


I pulled these so quickly, but I really think they work well together. After how long it took me to pull fabrics for the Hexibore, I'll take the quickness! :) I think the reason they work so well is that they have a similar value, and a similar earthiness. The only one I might need to rethink is the green. Either the palm or the grass green, they're not quite close enough to the same value. I think either works, but not together. One is either too dark, or the other is too light. 

Thursday, January 25, 2024

Terra Cotta Mini

After my stroke, I was itching to get back to the sewing room. I had done a little bit of English paper piecing in the hospital, but machine piecing is my preferred sewing method. But, my first week or so back was definitely time of recovery. I was worn out, I was sore, I wasn't walking very well at all. And I wasn't super confident in my fine motor skills needed for cutting and precision sewing. I was no where near confident to work on curves, which was my current WIP. Oh, and I wasn't limber enough to get down on the floor, so finishing the quilt I had in progress was out, too, since I was piecing rows together at this point. 

So, I had to figure out what to sew that I was up for sewing, and also had all the materials I needed...I toyed with a simple charm pack/HST quilt that's on my list, but I didn't want to use white for the background and didn't have enough of any other fabrics for the background, so that was out. I thought about Interwoven, by Lo and Behold Stitchery, but I didn't have solids and wasn't sure if the prints I picked were small-enough scale, and I read a reviewer who said the pattern required a lot of precision, so that was out. 

I had ordered a random sample pack of mini quilt patterns from Modern Makes (by Alderwood Studio) on Black Friday so I looked at the 5 patterns I was sent. To be honest, the set of patterns I got was pretty disappointing and if anything, it confirmed my decision to not participate in the program. I really only liked 2 out of 5, and 1 was excessively disappointing. Oh well, c'est la vie, non? One that I like is called Terra Cotta and I decided to make it as my first post-stroke project. The great thing about mini quilts is they don't take a lot of fabric, the cutting is minimal, and they wrap up quick. Plus, I can quilt mini quilts on my own machine. I'm not confident enough to quilt big quilts myself, so I send them out. But minis can be completely finished in a few hours. 


Luckily, I had some solids that worked great together and I finished it up a couple weeks ago. After I pieced it, it took me a few days to figure out how to quilt it. I didn't want to just quilt along the pieced style, I felt like that was boring. So I looked at my Walk book, by Jacquie Gering, and found a great design I felt like I could do. 

I'm really happy with how it turned out, and the only frustrating part is that I used a Sewline ceramic pencil to mark lines for quilt guides and I didn't actually get it all out. I tried scrubbing it with water with a microfiber cloth and a toothbrush, I even washed it in my washing machine (air-dried it after to avoid the heat of the dryer). They're faint, so I just gave up. Sadly. Lesson learned, don't use the ceramic pencils for quilt marking! At least for me.