Friday, July 18, 2025

Tiled Quilt {Roma Quilt Pattern}

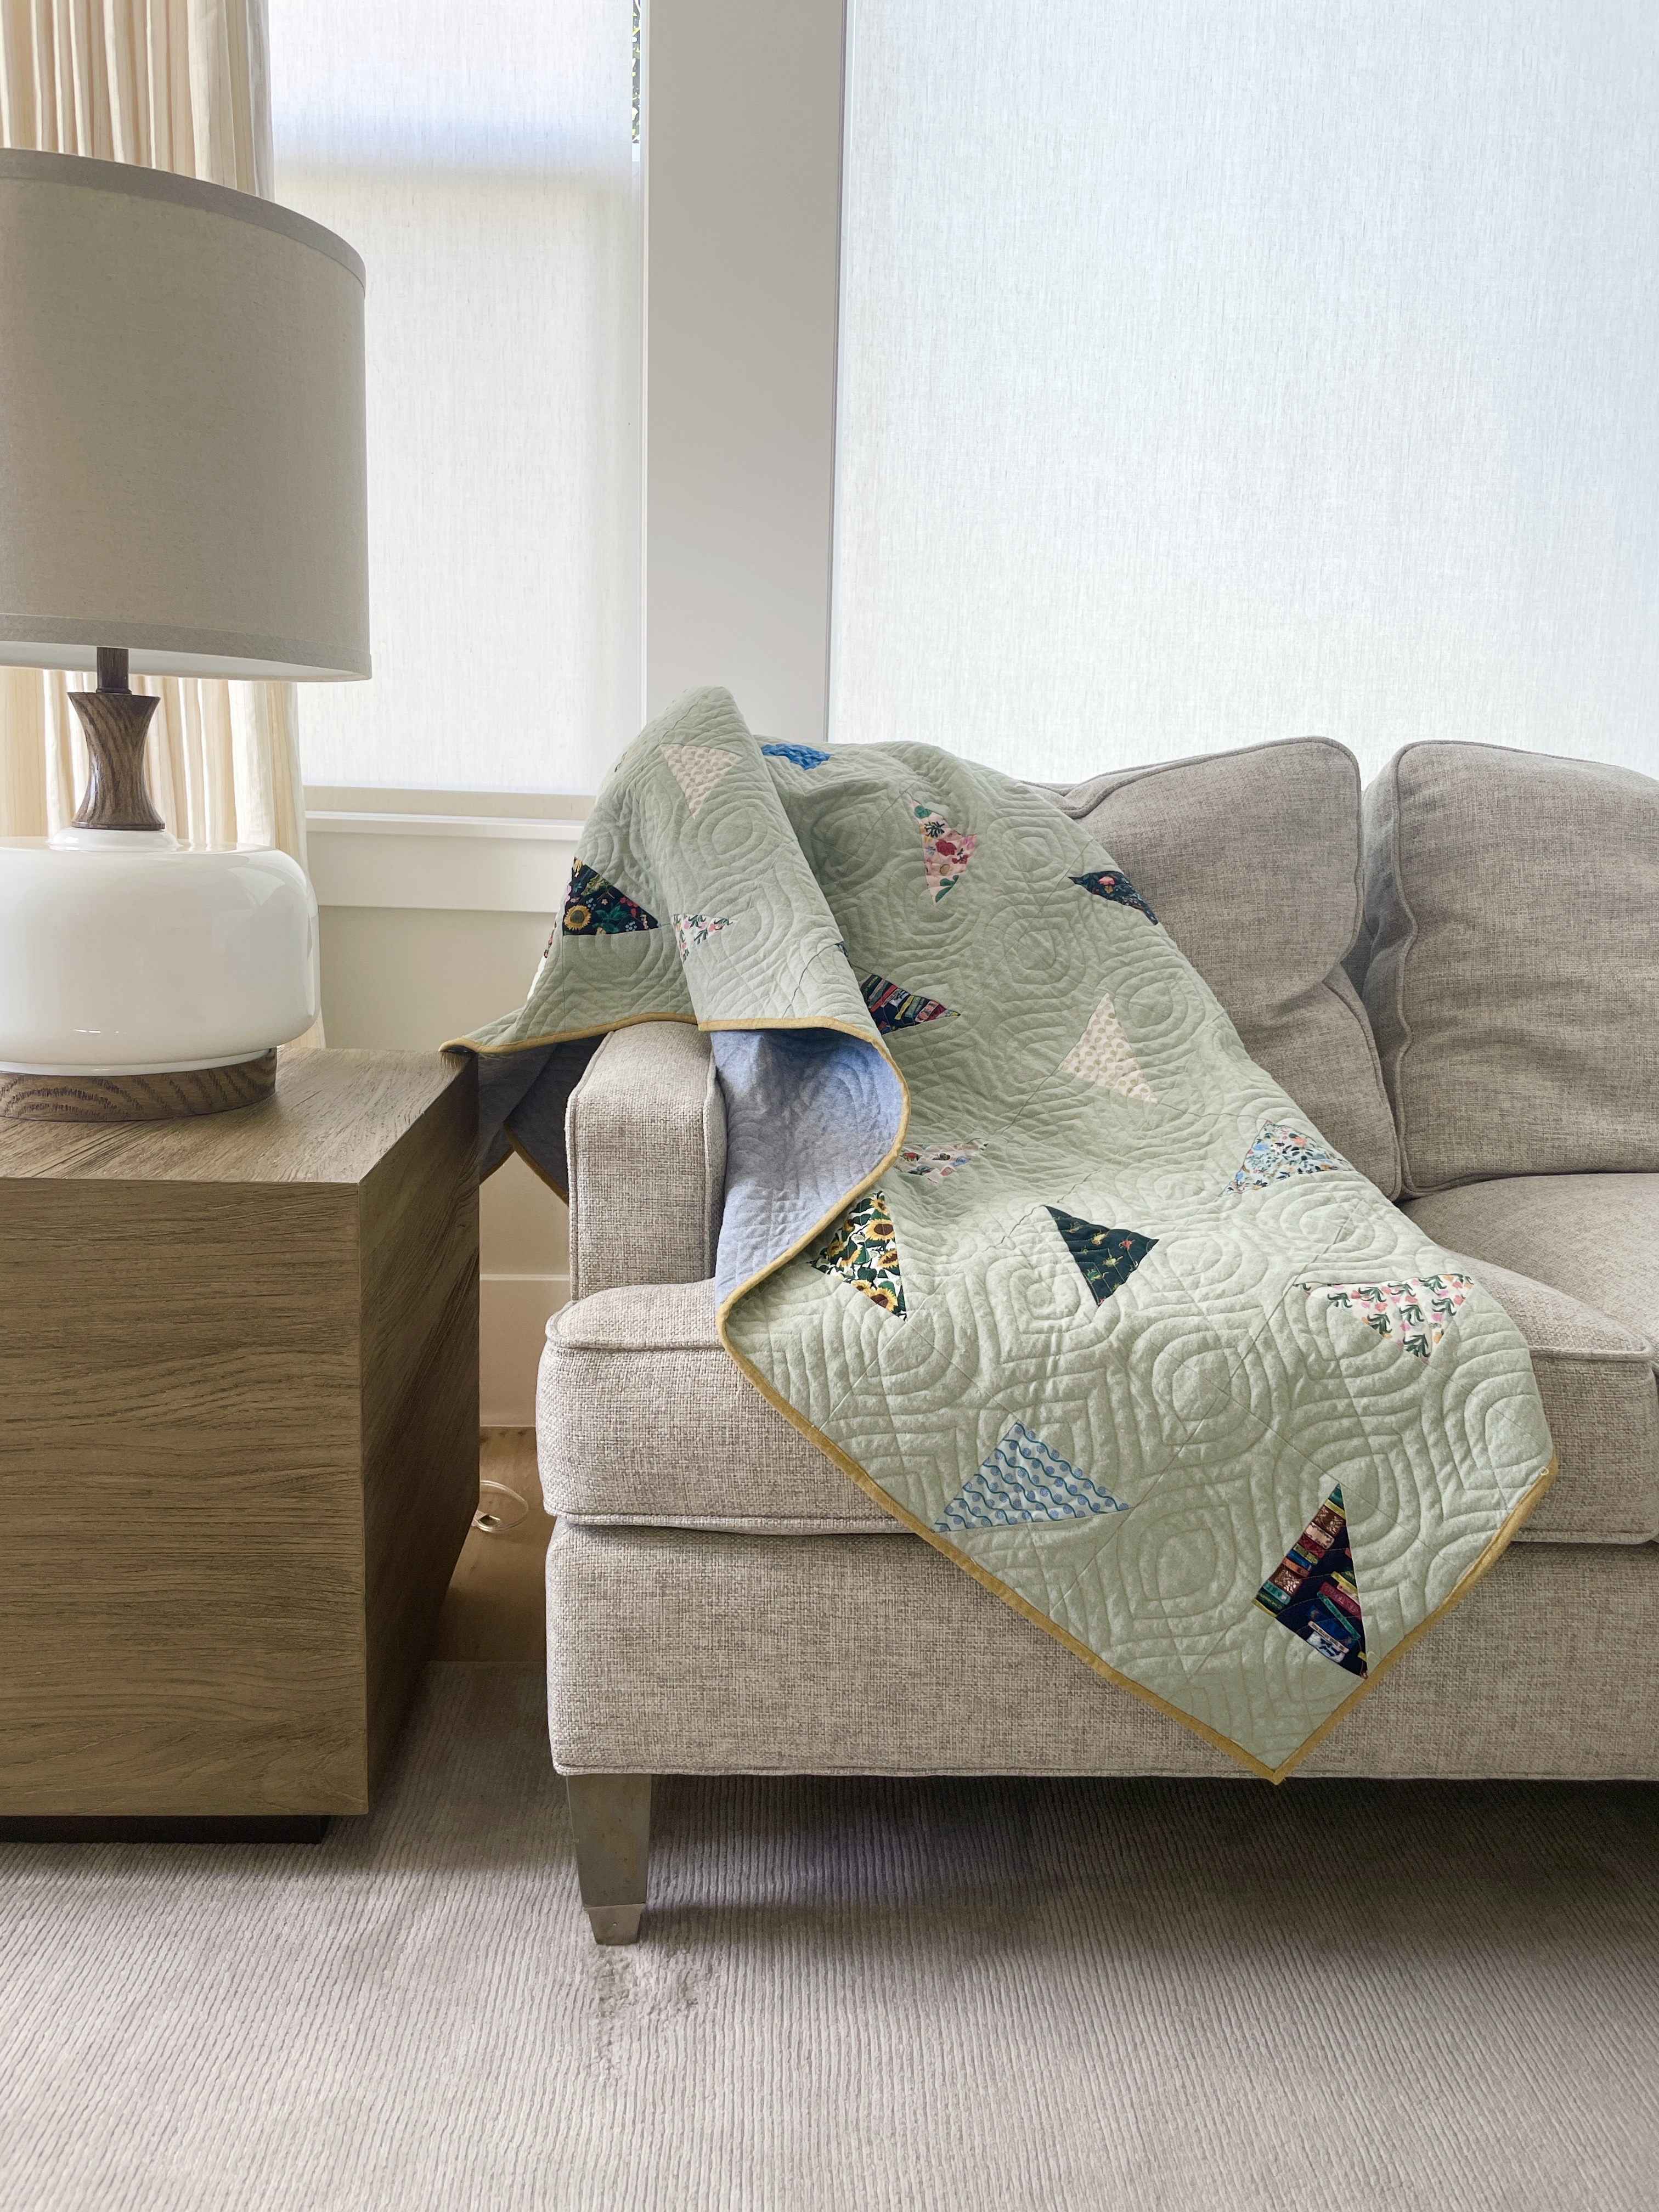
When I first saw the Roma Quilt, designed by Quiltd Studios, I knew I wanted to make it. I love mosaic quilts that are reminiscent of tiles, and I couldn't figure out just by looking at it how it was put together. Which means it was interesting. I bought it and squirreled it away until I was ready to make it. That time came this year, when I was preparing to go to Sewtopia San Antonio. This was my second Sewtopia event and I wanted to take a project I was excited about, but that wouldn't require a lot of brain power since there's so much going on and so much socializing at Sewtopia. 

At first, I planned to take the Interwoven pattern, by Lo and Behold Stitchery, but after I purchased fabric and had pressed it and was preparing to cut it, I realized how difficult the pattern was. Maybe that sounds dumb; I probably should have realized it would be a difficult pattern before getting that far. But I didn't. I thought, oh, strip piecing...precision, but mindless sewing. Perfect. 

Wrong. 

So wrong. 

I opened it up and started trying to decipher the directions and was SO confused. 

Guys, I have sewn, like, 70 quilts. I've created my own patterns. I don't do crazy hard stuff like applique, or really super technical stuff, but I'm a decently advanced quilter. And I could not figure it out. I realized right then that it was not going to work for Sewtopia. So I switched gears and pulled out my Roma pattern. I used my Kona color board to pick out some colors I thought would be great and bought them quick so I could get it all cut. 


Wednesday, July 16, 2025

Passages Quilt

This year has flown by. I was trying to explain to my kids (futile, I know) that this time is really so short and so fast. I think they do feel it a little bit, as they return to school in only about a month and they are not ready! But they do not understand really how fast time flies. 

Friday, January 31, 2025

Delicate Arch Quilt

I feel so lucky I got to make this quilt as part of a pattern test for Meagan at Lomond Slopes Quilts. When I saw her tester call, and the amazing design, I applied immediately. What an amazing quilt! I love the tribute to Utah. 

This quilt pattern has two sizes, a large throw and a baby size. I opted for the throw because I like big quilts, and if given a choice, I'm going to make a bigger quilt. It's a great size--some throws are too small in my opinion, but I'm very tall and my husband is even taller, which means our kids are also super tall. So big quilts are advantageous. However, after I finished, I wished I had sewn the smaller one. I think the baby size would probably make a great wall hanging, which would be perfect for the design. As it is, folded up on my couch, you can't really see what the quilt is, and so often that's how quilts live, especially throws. 


Thursday, January 23, 2025

Glam Clam Quilt

I kept this fabric pull on my shelf for months before committing to a quilt pattern. Some of the prints are large scale, so I needed pieces large enough to show them off. And, I'm always adding and subtracting fabrics until I actually cut into them. I was pretty sure I wanted to use the Clammy ruler, of which I had bought two at Quiltcon a few years earlier. But, what style? Traditional clamshell? Or orange peel, which I've had on my list for ages? Or, half circles?...in the end, I decided that since I had some low volume prints as well as some really saturated ones, the clamshell was the best choice because I couldn't decide on a background fabric for the orange peel. White would have been out of the question, and what other color would work? 


I'm really glad I went with the clamshell. It's a fun pattern, and it's a quick sew when you use the clammy ruler because they're so large. Of course, the painful part of clamshells is the copious waste from cutting them out, especially if you can't nest them because of directional prints or because the cut isn't wide enough. And, since they're so large, I had to put back a few of my fabrics because they weren't wide enough, but they would have worked for the orange peel. And, it's rather painful to trim the quilt when it's time to bind it: Latifah has a couple extra inches all the way around so you can trim it precisely and not lose any points/curves. The finished product is amazing, but man, cutting that much off...it hurts a bit. 

I am really thrilled with the finished quilt, though. Once I had it put together, I thought how perfectly me the color scheme is. It's bold but not harsh, and warm with enough coolness...and I got the color distribution pretty even. I love it. So very much.


As far as the pattern goes, sometimes I feel like Latifah's patterns are a tad lacking on the explanations. But she makes up for it with thorough video tutorials easily accessed on youtube and her methods are top notch once you figure it out. She accounts for the little details that make a big difference while not requiring extreme precision. 

I backed it with navy minky and bound it with a caramel color I had left over from another project...the travel tags quilt I made a few years ago. It's not a perfect match but I think it works pretty well, and I love clearing out leftovers from my solids drawer. I love the drape and coziness of minky fabric for a backing and this is the current favorite for my girls to snuggle with in the living room right now. 


Thursday, January 16, 2025

Horizon Lines

I love a pretty stack of fat quarters, who doesn't? And The Cotton Bolt has an amazing talent for putting together beautiful bundles. I love that she's putting together unique bundles that aren't just a single line or brand, a woman after my own heart! She's also a vendor each year at Garden of Quilts, and I always look forward to visiting her booth. A couple of years ago, I picked up a beautiful bundle that was designed for the Horizon Lines quilt. I figured it was such a straighforward pattern I could figure it out myself if I wanted to go that way, but I also thought maybe I'd do something else...

Monday, January 6, 2025

Efflorescent Explosion

My final finish of 2024 is this beautiful Hexibore quilt. I got it back from Mindy Powell, who did the beautiful custom quilting on it, in mid-December, but I was knee deep in Christmas sewing. I got all my Christmas sewing wrapped up a few days before Christmas, but then I needed to dive into a pattern test I had been selected for, so my quilt had to wait a few more days. I finally got to bind this quilt on December 30, and luckily, I had the binding all ready to go so I could finish it up quickly. 


Thursday, January 2, 2025

Happy 2025!

Happy New Year's! This year has gone by so fast, and this time of year calls for some reflection and pondering. It's so contrived to review the previous year and look ahead, but it's also pretty important. This past year was one for the books.


I was able to be home from the hospital in time for new year's last year, so I spent the whole year at home. It was a pretty big year of recovery and challenges, but I feel so grateful our little family survived without too much wear and tear. January was largely a bust, and I spent time sitting in my sewing room wishing I felt up to sewing, but I felt foggy and uncoordinated. By February, I was more agile and able to sew again, though I was still a lot slower than I had been. But, I got my first finish in.


Saturday, December 14, 2024

Christmas Sewing and Updates

I love the Christmas season. It's so full of hope because of our glorious Savior and busyness in the best way. And it's a time for making a creating. 

I made this pillow a few years ago and I love it.

I spend most of my time working towards things for others, like most of you. Selecting gifts, sewing gifts, and making sweet treats. Each year, I make homemade marshmallows and dip them in chocolate. It's one of my favorite traditions, and it's one I missed out on last year while I spend the month in the hospital recovering from my stroke. This week, I've been busy making hundreds of marshmallows. And it brings me joy. We bag them up by the dozen and deliver them to neighbors and friends. I will admit that when someone asks in anticipation if we are doing marshmallows again, or a friend grins wide and squeals when they see the bag, it makes me so proud. 

Friday, November 8, 2024

Supernova Quilt

The bandwagon is a real thing, and it fuels the quilting industry. We all feel the pressure to make all the pretty things, in the latest must-have fabrics, which seem to come out at an ever-faster pace. I have a closet full of good intentions: fabrics I had to have, haphazardly organized by color with assorted stacks pulled out for future projects. At any moment, I have 3-5 quilt projects in my queue, which doesn't include the other projects I have planned, some with fabric purchased/selected, some waiting for just the right moment. My stash has finally reached the stage of burdensome, where it doesn't fit in my drawers any longer and it feels heavy--like I need to put a dent in it. Truthfully, I sew almost entirely from my stash. It's kind of awkward when a well-meaning, friendly employee asks what I'm making while she cuts my purchases. I rarely shy away from saying my stash, and I try to not feel badly about that because when it's time to make a quilt, I don't go to the shop to buy what I can find that hopefully will be perfect--I open my drawers and audition fabric I already have. It makes my quilts so personal, a reflection of my stash and my preferences.


Monday, November 4, 2024

Come Bind with Me (A machine binding tutorial)

I have made over 50 quilts over the past 15 years and I can hardly believe it! I was reflecting on that, and how much my binding skills have improved, as I finished the binding on my Picture Perfect Snap Happy quilt. My bindings still aren't perfect and I know I can see the flaws, but they're so much better and I'm really happy with them. I feel like I've found a good balance of secure and good enough. I choose to machine bind for a couple reasons. First, it's faster. By the time it comes to binding, I want to snuggle with my quilt, and not while I'm hand sewing on the binding. Second, I don't enjoy hand sewing. I have started English Paper Piecing, but that's really it. I loathe appliqué. I tolerate hand binding on mini quilts and really special quilts not meant to be used hard, and only if they don't have minky. And third, machine binding is more secure. My quilts are for loving, and with four girls they get loved. And occasionally used for forts. 

As I thought about it, I realized I've developed my own preferences for binding and that maybe it would help you if you're still figuring out what you like and how to get your binding to place where you're happy with it. If you're looking for show quilt binding tips, this is not it. But if you want to be happy with secure and even machine binding, keep on reading!

Sunday, November 3, 2024

Picture Perfect (A Snap Happy pattern)

When I saw the Pen and Paper Snap Happy pattern release, I had to have it! I was so excited about it. I love photography and I felt like it would a great quilt to showcase some fun travel prints. Or, to use her tutorial to print some of my own travel photos onto fabric and have a real memory quilt. I was so excited I bought the pattern at Sewtopia in Milwaukee, even though I had no intention of sewing it during the trip.


I quickly decided on using Rifle Paper Co fabrics, because their Bon Voyage line had come out just about a year ago. I knew it would be perfect. I opted to fussy cut the feature prints and I also added in a few prints from other lines and I really love all of them. Because I was so excited about this pattern, I made it pretty quickly, for me, anyway! I didn't manage to participate in the sew along, but within a year of the release is still pretty quick for me. I'm usually pretty late to the party. 

Wednesday, October 2, 2024

Curio Quilt

Every Christmas, our sewing gang has a favorite things gift exchange. There are only four of us, so we buy a favorite for everyone. Last year, Kat gave everyone charm packs of the Curio collection by Rifle Paper Co. I LOVE Rifle Paper, so I was really excited to get it and sew with it! Curio probably isn't my favorite Rifle collection, but those books are dreamy. I feel like Curio kinda had a bit of a retro vibe with the sunflower print; who wasn't obsessed with sunflowers in the nineties? They were everywhere! 

I don't use precuts often at all, but I really wanted to use this charm pack and show off the great prints. So I settled on recreating a quilt I had seen at Garden of Quilts at Thanksgiving Point. It offset half square triangles so they were sprinkled all over the quilt, and it I felt like it was a really fun, modern way to show off prints. 


I opted to use Essex linen for the background and the backing and the binding. I wanted the texture to really add to it, since it was such a background-heavy quilt. I went for a yarn-dyed seafoam green, and I think it's perfect. 

Using an entire collection can be hard because they usually include low volume and/or prints with white backgrounds, which make it difficult to pick a background color that will adequately show the quilt design. This green I thought worked great. I pulled it from some of the prints, but it's different enough from all the backgrounds of the prints that you can see the design well. 

It went together pretty quickly and I really like it! I swapped out some charms that weren't my favorite and added in some extra book fabric, because, hello, books. :)

And I took pictures of it using tips from Matante Quilts, who recently hosted a mini webinar about quilt photography while she prepares for her next workshop on photography. I can't believe how much better they are!

Friday, September 6, 2024

Tiles Take Two

Right now, I don't actually have a leaders and enders project prepared, because I can't seem to pick one. I'm using my slow project (which has roughly 4 million curves) as leaders and enders, but I hope to get a new one picked soon. I got my last one bound, and it's making me feel even more pressure to get a new project picked already! :)


This quilt is my most recent leaders and enders, and I used the Sunset Tiles pattern by Jeni Baker in Scraps, Inc. Vol 1. I've made the pattern before but I messed up while assembling and some of the rows are sewn together incorrectly, which messed up the pattern and made it pretty out of square. I love that quilt, though, and I wanted to have another go to try and get it assembled correctly. It's set on point, and it was the first time I've done a quilt on point, so it's understandable I messed up, but still disappointing. 

Plus, the pattern is a great one for leaders and enders. It's simple to sew, the pieces are a great size to use up scraps, and color placement within blocks is a non-issue, making it pretty perfect for a leaders and enders.

I made this version a bit larger, and like my others, I backed it with denim to make it more durable for picnicking. I don't love the colors quite as much as the first one I made, but a friend on IG said it's cheerful, which I think is a great way to describe it. 

Tuesday, September 3, 2024

Fringe Dress

I want to like sewing clothes more than I do. I'm so tall it's hard to find things that fit properly, and it's nice to be able to make something you want instead of trying to find it. But, quilting really has my heart. Still, I sew clothes somewhat regularly, and this is my most recent make. 


I bought the Fringe dress pattern (finally hopping on that train, it's such a popular pattern!) during a sale at Chalk and Notch. I was specifically looking for a pattern to use for a cut of linen I was given by Harmony Fabric in Provo for winning a giveaway! I won 3 yards, and it's such a lovely light blue linen. Since I'm tall, I had to be careful about pattern selection, since I need to add so much length generally, I couldn't risk running out of fabric. The fringe dress was well within the fabric requirements, I think it specifies only 2-1/2 yards or so, so I felt like I'd have plenty. Plus, there are so many fringe dress pictures on the internet in all sorts of different fabric selections, and I felt confident it would look great in my linen. I snagged a paper copy during a sale they had, and eventually got around to sewing it. 

Honestly, I think this is among the quickest I've ever sewn up a planned project, haha. I got the fabric in April, and I sewed up the dress a few weeks ago, in August. I tend to stock up on fabric and/or patterns when they're on sale and then sew them when I'm feeling inspired or need it for a specific reason.

Maybe my reason just came up quicker than usual; I made it for family pictures, which we just did a few days ago. 

Part of the reason I dawdle is I dislike making muslins. I know it's so important and definitely not wasted time, but it feels like it. And, half the reason I like to make clothes is so they fit me, but what that means is often I don't fit in a straight size, so then I have to decide which size to start with, etc etc. And then tracing the pattern...I don't love prep work. 

Still, I persevered, and added the length I thought I'd need to check, and was pleasantly surprised it fit pretty well straight out of the envelope. So, I set about making it in the linen. 

Overall, I'm pretty pleased with it. I opted to straighten the hem out, and I made the v-neck with buttons and added the sleeve tabs. I love that I didn't have to adjust the neckline at all for good coverage (I'm not into showing off cleavage, sorry! I get cold, what can I say?), and I love the ties detail. I opted to add mine to the back darts because it seems like such an interesting detail. However, now that I've made it, I think I probably should have made it a size larger. I was really thrown off because the muslin (and the dress) genuinely look like the right size. It doesn't feel too snug when I wear it, except for perhaps across my arm, but that's easily explained by the drop sleeve construction. HOWEVER--because the buttons only extend to the waist, which is flatteringly situated just a bit above your true waist, the opening isn't *quite* big enough to comfortably put on and take off. I kinda feel like a gymnast every time I wear it, and I'm always worried I'm going to pull something (I am 40, after all...) or rip it. It might be my fault--I left in the basting stitches from gathering the skirt. But, I don't logically think it would do that. If I could take them out easily now and check, I would, but I serged the seam so it's nice and finished. I don't think those stitches are coming out, haha. Once I really struggled, I realized that most dresses take the opening down past the waist, so I feel like it's a slight design flaw and I'm surprised no one else has complained. 

The other disappointing thing about this dress is actually the fabric. When I got it, it was so soft, I was so excited to wear it. And it IS very soft. But, it is a deadstock linen and I'm learning that you just need to be careful with deadstocks. This one had some really thin spots where the weave was uneven and just thin. So I carefully cut around it as best I could. But it just seems like kinda shoddy fabric, which I find really disappointing. I'm really glad I won it in a giveaway and didn't purchase it, because I would have been upset at the quality. I don't know how long it will last with the quality of the fabric, but I really like the dress even still and will probably make another. It wasn't a difficult sew at all, and again I love the neckline and the ties detail. 

Sunday, September 1, 2024

Birds of a Feather (a Glare quilt)

I've finally finished my quilt from Sewtopia! Latifah Saafir taught her Glare quilt pattern, and I was excited about it. Latifah's patterns are graphic and modern, and I already had several patterns and templates. When I decided on fabric for the project, I wanted to make sure I used a focal print that the large centers would really show off. I opted for Tula Pink's Daydreamers flamingos. And from there, it just kinda snowballed. I ended up using exclusively Daydreamers fabric for the quilt, and even used Tula Pink solids for the alternating blades and background. I don't think I've EVER made a quilt from exclusively one line. I always mix in other fabrics even if it is primarily from one fabric line. But I don't often use Tula Pink fabric. When my friends saw my quilt, they said how unlike me it was. I disagree, I think, but I can see where they are coming from. Even thought the Daydreamer line doesn't have the garish clashing colors that some of Tula's lines have, it is ALL BRIGHT, and my quilts tend to be at least a little tempered. 


I really love how it turned out, though, and my kids fight over it right now, even though I backed it with a Tula wide back instead of the usual minky. I love how the rounded corners give it a little extra something, and that it wasn't that hard to bind. 

This quit pattern was a fun one to sew and went together relatively quickly. The blocks are large. It does take some finessing, some getting used to the technique, and I did do some unpicking. It's interesting that on curves, the way you iron (whether toward the curve or away from the curve) can impact the puckering, and not every circle was the same. 

I would definitely make this pattern again. I loved how it turned out and would love to try out some different fabric choices. I used the background fabric as some blade fabric as well on a couple of the blocks and hoped it would blend into the background to make it appear more spiky, and I'd love to try that with all the blocks, to give it a feel like the suns we all used to draw in elementary school. I think that would be cool.

Friday, August 23, 2024

Winning Ribbons

I posted my Garden Gem quilt already, and I mentioned I planned to enter it at the Springville Art Museum for their annual quilt show. I like seeing my quilts hang in museums, it's fun! And I was really happy with how it turned out. I try to not worry about winning things, because it's not why I make quilts and honestly, I'm not technical enough to really worry about it. Still...I kinda thought, *maybe* it might win a ribbon, my points (the very few there were) lined up really well and Marion did a fantastic job quilting it. I didn't dare hope, but honestly, I really hoped. I just tried to say I didn't care. 

But luckily, I DID win a ribbon, which makes my second this year if you count my Sewtopia ribbon, which I do. :) Interestingly, both quilts use designs by Jenny Haynes of Papper Saxsten, so clearly, she's designed award winning quilts. As a ribbon winner, I was invited to the opening reception award ceremony and of course I went, I was anxious to find out what ribbon I won! I didn't dare take my girls because I didn't know how long it would be and I didn't want them to be disruptive or bored... but I probably should have taken them. Instead, just my husband and I went. Of course, they began announcing the winners from the bottom up, starting with those that had been awarded honorable mentions, and then awards of excellence, and then judges choices, and I kept waiting for my name to be called and it kept not being called. Finally, there were only a few ribbons left and they finally announced my name as the director's choice! She was announcing the awards so she shared a little bit about my quilt and how much she loved it and was so glad she got her first choice, which doesn't always happen. I was absolutely thrilled! 


We brought our girls down a few weeks later to see it at the museum with the ribbon and they weren't all that excited...but I did see another quilter who had won a ribbon in the same gallery and we talked for a bit. She told me there was some drama on the ribbon winning for the Dear Jane quilts and I realized going for ribbons is not for me. I'm so glad I won, and I'm not going to lie, I'm excited to see how much money I won for winning a ribbon, but I don't think ribbon seeking is for me. I mean, I machine bound my quilt. :D

Wednesday, August 7, 2024

Beach Puddles

The other quilt I got bound recently was this version of Candlelight by April Rosenthal. I made her kit version with the same fabrics from the cover quilt, and I love it. It's fun to put together with the traditional blocks. In the pattern, she emphasizes that value gradation is a key part of the quilt and making the design really pop. I thought it would be fun to play with color gradation instead and went with yellow to blue. I really like the colors and I think it worked out well but it didn't have the same impact as the value gradation. It's interesting how the changes made it pop differently. I treated yellow as the light and navy as the dark, which makes sense, but the warm yellow pops more than the cool blue so it's interested to see color theory in action. And the middle colors kind muddle together...I should have used the yellow for the stars so they popped more than the rolling stones blocks.


I omitted the border on it because I couldn't decide on what fabric to use, and it was a pretty narrow border anyway. So it's a tad smaller than the original, but I don't think it's too small by any means. Although, I do tend to prefer large quilts ;-). 

Here's my original Candlelight quilt, which I realized as I wrote this that I had never blogged about. 


Beach Puddles, quilted by Abby Latimer, completed July 2024

Original Candlelight, quilted by Abby Latimer, completed November 2020

Sunday, August 4, 2024

Federa Quilt

Summer has flown by for me. Our kids go back to school in just a week and a half or so, and I can hardly believe it! I've got to pack a bunch of fun things in that we've meant to do all summer, and it just hasn't happened yet. A hike, maybe (if I can talk them into it...), a day at the roller rink, shopping for family picture clothes...plus we need to review everyone's uniforms and make sure they have what they need. We have had a great summer, even if I feel like I need to make up for lost time. We took a roadtrip up to the Pacific Northwest and visited the San Juan Islands and Olympic Peninsula with a short stop at Cannon Beach before coming home. It was a lovely way to start summer. But, we haven't done our typical summer sewing service this year (we also missed last year) and that makes me kinda sad. Maybe next year we can get back into it. I have had my girls help cook for the last few weeks which was on my list...I want them to help me just once a week so they can start to learn how. My older girls end up doing most of the work while I assist, and my younger ones help until they get bored waiting for various steps and never come back...but it's okay. Progress, right? 

And speaking of progress, I've made progress in my sewing room, too. I bound two quilts, including my Federa Quilt, which I mostly pieced at Sewtopia in April. It's the Wasatch pattern by Compass and Wildflowers. I used colors inspired by our trip to the Dolomites in October, so yellow and orange foliage and turquoise for the lake. We got to visit Federa Lake while we were there and it was absolutely stunning. 


The piecing was really simple and a perfect Sewtopia project since I could just grab strips and go; since it was made of solids and all the blocks were the same, there was no need to lay things out or worry about spacing out colors and fabrics evenly. 


Unfortunately, it's not square. I appreciated that she has you cut blocks in halves or quarters to add to the edges to make the edges straight so you don't have to trim it after quilting and lose so much of the blocks, but I wonder if that was partially to blame for it's lack of squareness. It doesn't really matter, not really, it's a throw quilt and even if it was a bed quilt, I'm really not much of a show quilter. (Although I do have something to share about that later; stay tuned!)

I love this quilt and that it reminds me of Italy. Our trip to the dolomites was really great, I'd love to go back! It was just beautiful. Although, I think we'll wait until after the olympics go through; there was plenty of construction as they prepare to host.

Friday, May 3, 2024

Sewtopia Milwaukee

I am so excited to share about my trip to Sewtopia in Milwaukee! It was amazing. More amazing than I could have hoped. There are a bunch of pictures, and a lot of them are even more terrible than my usual sub-par standard because interior lighting is ROUGH. But hopefully they give you a good idea!


First, while my sewing bestie did not get a ticket initially, Megan and Amy saw my note on an instagram post that she had not gotten a ticket and when one came available a week before the event, they emailed me and offered it to her directly. So she got to go! I was majorly impressed with her spontaneity. I was nervous about being by myself when so many of the attendees had been before or were attending with friends and I worried I would feel lonely. That worry was unnecessary, as everyone was so exceptionally friendly and inclusive, but I was still glad she got to go. I didn't really know what to expect, but I did anticipate bringing home more than I took with the shop hop. I didn't realize how much extra stuff we'd bring home, though! We got amazing swag bags with patterns and precuts and batting and more, and everyone gets a doorprize at some point through the weekend, and many of them were fat quarter bundles. You can see the one I picked in a picture below, barely, in the picture with the pouch I received in the swap.

 The event on the whole was so fun. The shop hop was great and I got some fun fabric, including some great additions to the quilt I worked on for Latifah's class (more on that later). The saddest part to me was that the shops seemed understaffed and overwhelmed by our visit, and cutting and checking out took FOREVER. I only got to one shop at the second stop instead of both shops (which were just a block away from each other) because they had only one person cutting and one person checking out. So I waited roughly 40 minutes to get cut. I try to not feel FOMO too hard, but I was disappointed to not get to both shops. We also visited a quilt and textile museum, which was pretty cool, although it took longer than I think we really had budgeted for in the shop hop unfortunately. There was a 25 million stitches project on display, which was in recognition of the refugee crisis. It was dark, and there were so many embroidered panels, so pictures were hard and I only took some of the some of the panels I really loved, one is below.


I took my Wasatch quilt project to work on because it seemed like it would be mindless sewing since it's a log cabin construction and I used solids, and it was a great choice. I was in the afternoon classes, so we had a couple of open-sew periods before our first class, and I nearly finished my blocks during the weekend. I miscut and was 8 pieces short of one of the colors, so I couldn't finish it. But, I was so happy with my progress and was able to quickly finish the quilt after I got home. It's now at my quilter's for longarming. 


We had two instructors for the weekend: Latifah Saafir, who taught her Glare quilt, and Violet Craft, who taught us how to turn a photo into an EPP pattern. Both were so great! I got three "blocks" done for my Glare quilt, and I'm excited to jump back in this weekend to work on more. I'm a little nervous about the assembly, because she showed us briefly at the end, but it seemed a little tricky even though the curves are nice and big and gentle. I am using Tula Pink's Daydreamer line, and it feels funny to me to use a single line. I never do that! But I thought the flamingos were perfect for the centers and it just kind of snowballed from there. It's going to be a pretty bright quilt for me, but I think it'll be really pretty. 

As I've shared previously, I didn't feel comfortable participating in the Super Secret Swap just in case I wasn't up to enough awesome sewing before the event. But I did sew a swap item and Phyllis got my Luisa crossbody bag, which she loved with the focal Tula Pink print. I got a lovely pouch made my Anja. The zipper work looks so tricky and she said she struggled, but it looks like she breezed through it. The topstitching was well done, I assure you, and my girls have already tried to take it for themselves but I wouldn't let them. 


The biggest news I have to share is that I won the fabric challenge!

 For every event, Sewtopia hosts a fabric challenge, and this one was sponsored by Windham. We were sent 6 fat quarters, including three prints by Heather Ross and three solids. I brainstormed and wanted to use the stripes creatively, that was my biggest focus. I decided to make an Above the Cairns quilt, designed by Jenny Haynes, even though I haven't taken her workshop. I have taken her Hexibore workshop, and I have some of her templates, so I just went with it...I had to print the largest durkard's path template from Electric Quilt. My goal was to have the lighter peach snail print and the orange solid blend together with the striped fabric which had the peach and orange colors in it. I used the strawberry print for the centers and since they kind of resembled cobblestones, I titled it Roman Cobblestones because of the delicious strawberries we had there when we visited a few years back during strawberry season. I quilted it with my walking foot, using a design from Jacquie Gering's Walk book for the main center. Amy said my quilting was what really sealed it, and I got loads of compliments on the quilting. I felt so proud of it!


 I never quilt my own quilts, and this was really as big as I'd want to quilt myself. I got a first place ribbon, made by Megan, and a box of fat quarters of the full line of Windham solids. I'm thinking maybe I'll order Violet Craft's peacock quilt pattern and use them for that, which seems fitting.


Friday, April 5, 2024

Luisa Crossbody Bag

So…I was really happy with the pouch I made for the sewtopia blind swap. I thought it turned out great and I felt like I had a good amount of extras in it. I even kinda felt like I didn’t want to give it away. 


Then, I watched the replay of the question and answer zoom call. And they talked about the swap and about the projects they were making for it…and my pouch seemed too simple. And I reread the swap instructions in the attendee packet and they have changed the wording from a small item such as a mini or pillow or pouch, to a medium item such as a tool organizer or favorite bag. 


Yeah. My pouch was not good enough. 


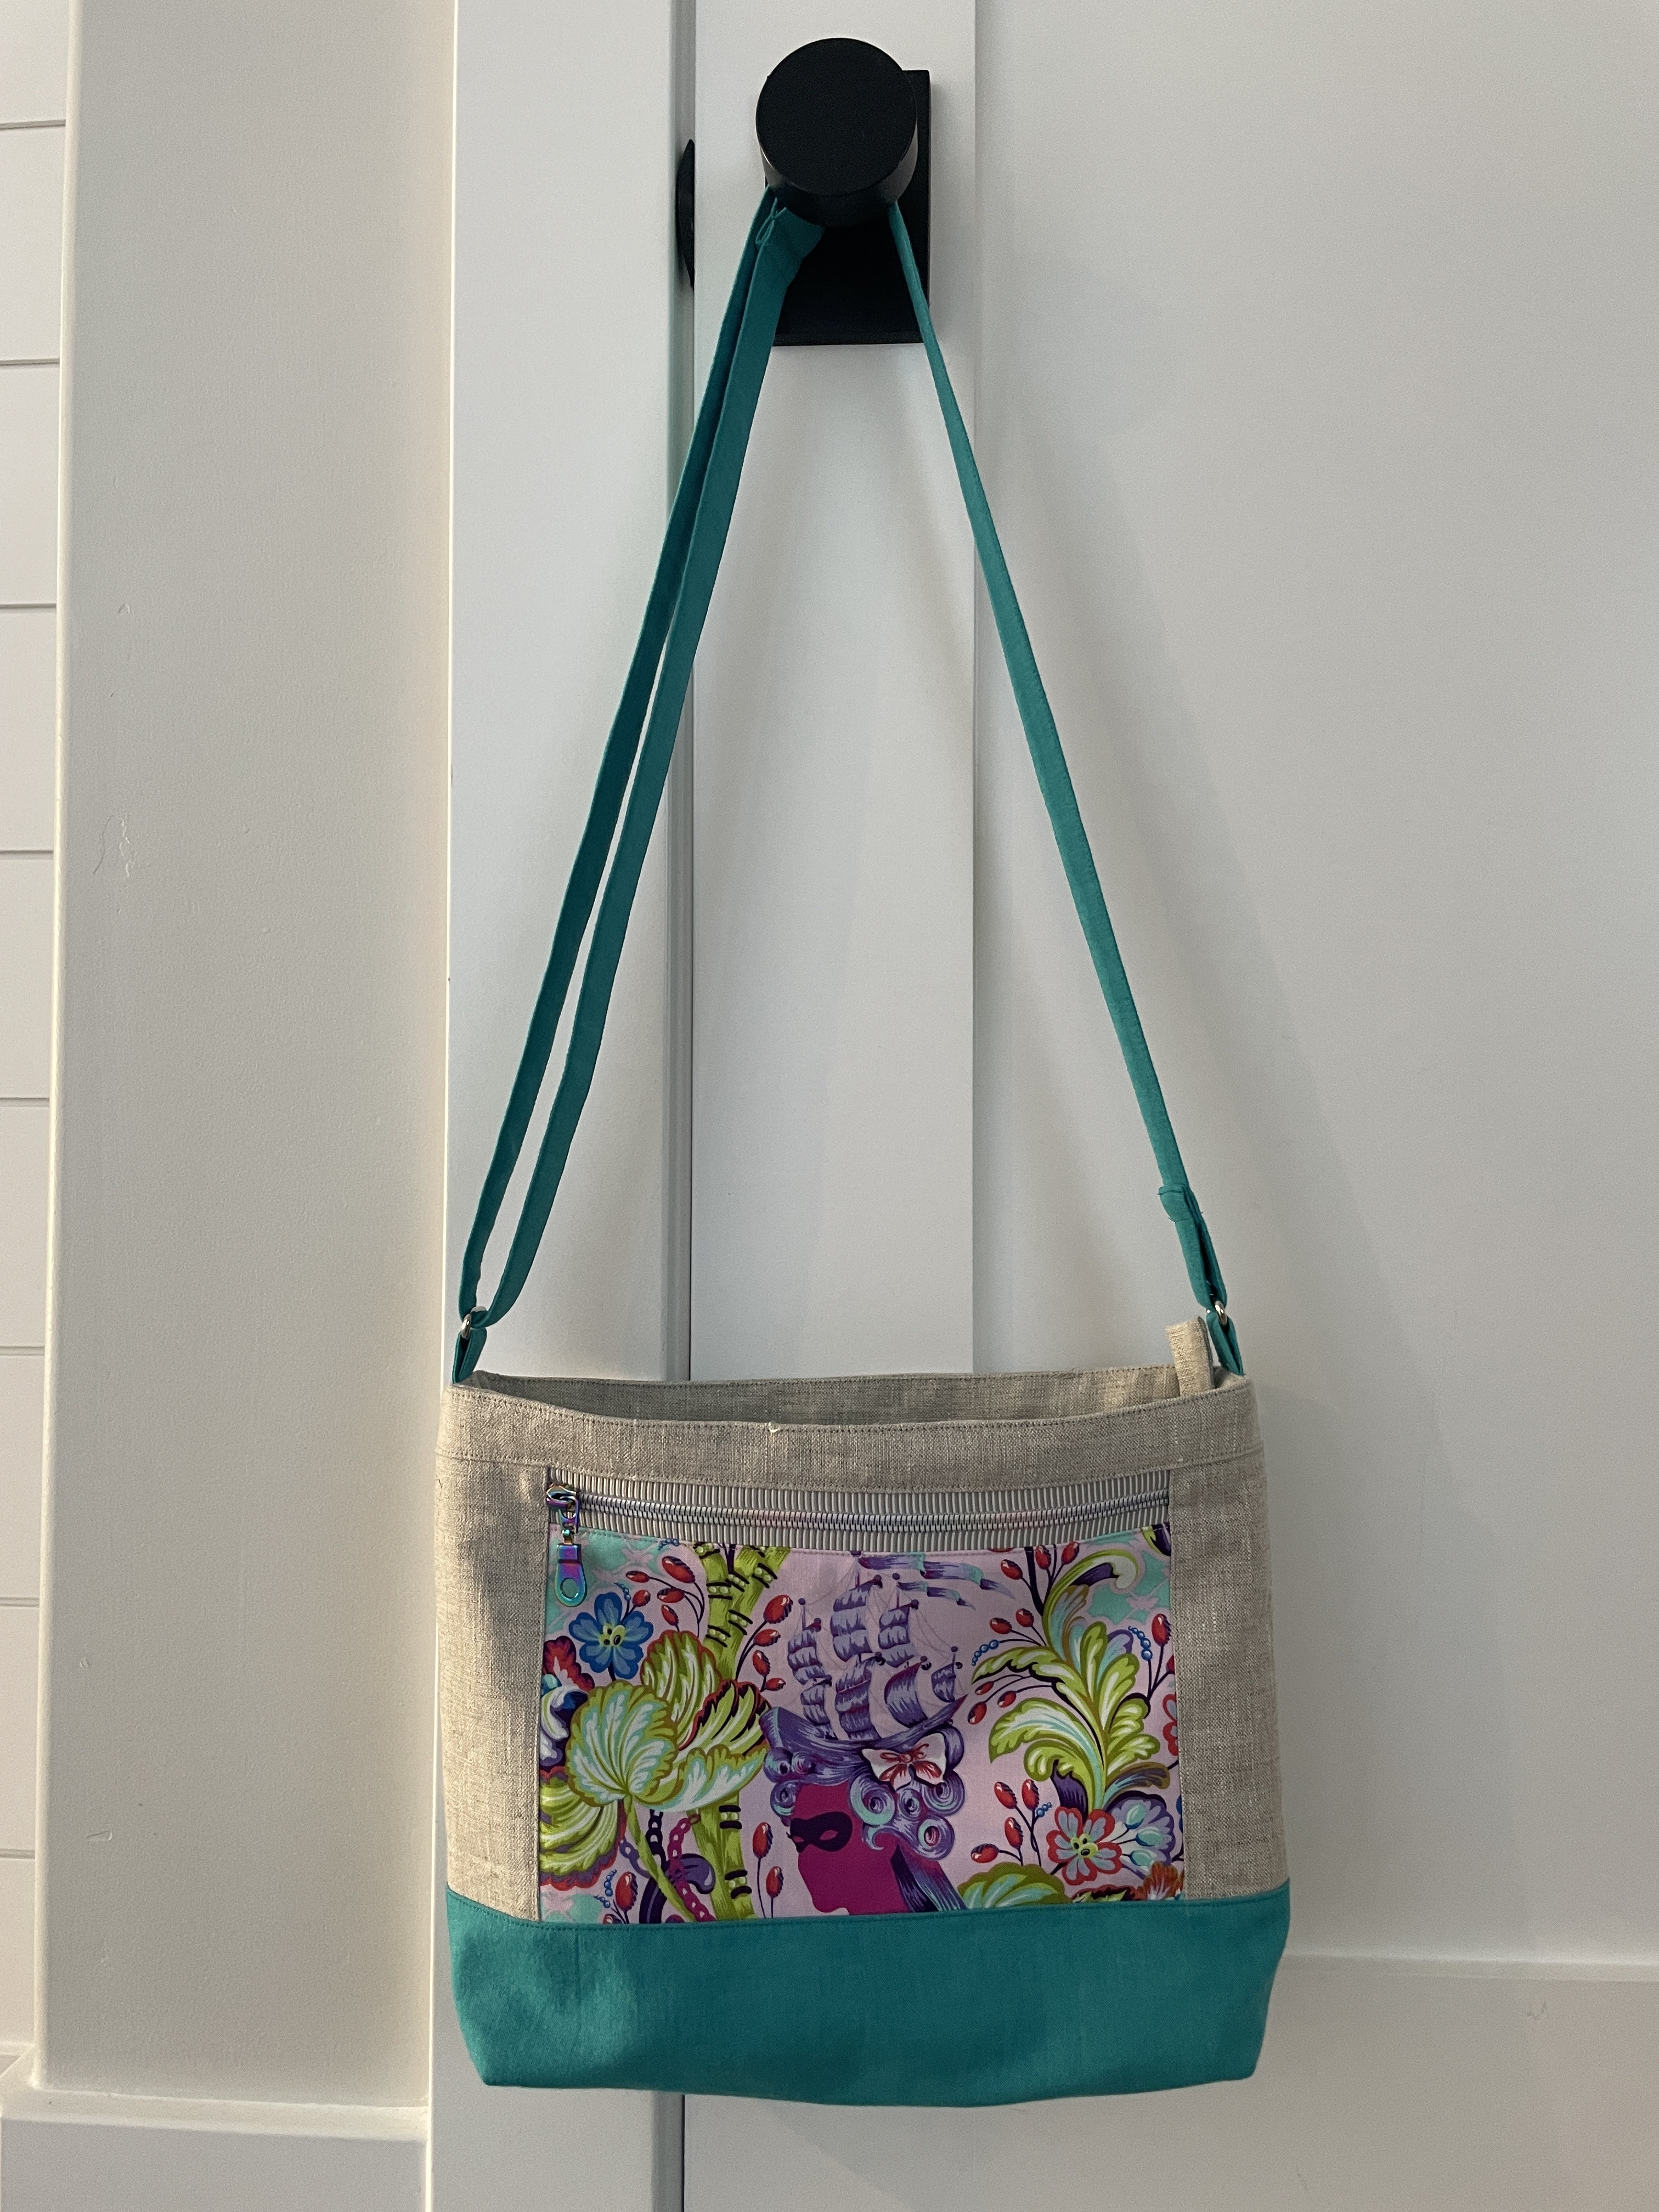
So, I started brainstorming because sewtopia is less than a month away now, and settled on making a Luisa crossbody bag by Sotak Handmade. I haven’t made it yet, but I thought it would be simple enough to try and would be a good pattern for a focal print. I chose a Tula Pink cameo from the Parisville deja vu line. Luckily, I found fabrics to go with it for the rest of the bag and I think it turned out great! 


I’m really pleased with how the zippers turned out. This rainbow zipper tape by the yard was an impulse purchase while I bought some other zippers by the yard on Etsy and I think it’s perfect for this bag. 


I did have to adjust how I inserted the zipper for the main compartment because I couldn’t figure out how to close it as written for a regular zipper, so I added another tab to the open end. I also think it could use a slightly wider strap, it’s a pretty big bag for only 1” wide. I also should have used a stiffer denim for the interlining, I think it’s a bit slouchy on the bottom contrast part. Otherwise, I think it’s a great bag, and once again, I’ll be sad to give it up. Hopefully the recipient loves it too, and I get something amazing myself!