While I was still pregnant, I did a lot of internet surfing. I was stuck in bed for much of the day because I was so exhausted and uncomfortable, and while I did a lot of non-computer things, too, I needed variety. Or a break for my fingers from hand sewing. While surfing, I spent some time hanging around
The Red Headed Hostess's website. She has great resources for religious study, including some great items to purchase. A lot is geared toward
Mormons, but much of it could be applied equally well to other religious groups, as well. I was really intrigued by her scripture study packets, but hesitated to purchase for two reasons. I wasn't sure how well I would use it for my studying, and I didn't feel like I needed "pretty" study sheets. So, I created a printed sheet for myself for general conference talk studying that had the sections I thought I would need (inspired by but not identical to hers), and I started a scripture journal following instructions she had on her blog
here (scroll to the bottom for a link to a PDF with concise instructions and tips).

I bought a simple composition notebook at Target before school started, and started my journal. But I decided it really needed a cover. I looked around online, especially Pinterest (see note above about internet surfing...) but couldn't find what I was looking for. I wanted it to have a pen pocket and some sort of closure, I was leaning toward an elastic strap rather than a button and loop, but would have taken either. So, I decided to wing it. I measured the book and guessed at a good placement and size for a pen pocket, and went for it. And decided that someone else might like to make one, too, so I thought I'd write up a tutorial. I made my first one out of solids that I had leftover from other projects, as a trial, but I liked it well enough that it's the one I use. I've made one for my sister, one for my mom, one for my daughter, and one for a friend out of cute fabric now that I have the sizing and technique down!
First, you'll need a few materials.
Fabric
- inside cover 11x24-1/2
- front cover 11x6-1/2 and 11x16-1/2
- pocket background 11x2-1/2
- pocket front 12x2-1/2
elastic 12-1/2" piece of 1/4" elastic
Pellon SF101 fusible interfacing: enough to fuse to the cover pieces and the pocket background
Step one: Fuse the interfacing to the cover pieces and pocket background. I like to fuse a larger piece of interfacing than I need to an even larger piece of fabric so that I can trim it to size. You could use a heavier weight fabric instead, but I like using my quilting cotton stash, so interfacing helps make it a little sturdier. I know some people complain about rippling from interfacing, but I have found that if I press the front of the fabric well after I fuse it that it looks pretty flat. Trim the pieces to the sizes listed above.
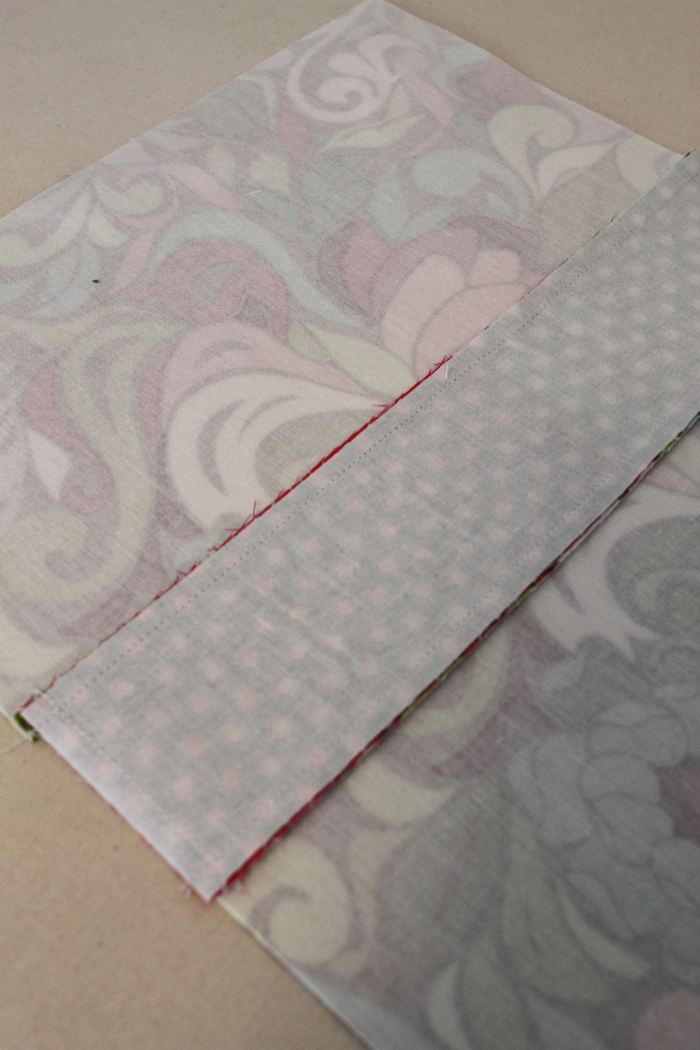
Step two: Prepare the pocket. Press the pocket front fabric in half matching the short ends. Using an 1/8" seam allowance, sew the pocket front to the pocket background along the bottom edge (short end) with the raw edges of the pocket front at the bottom. This is technically unnecessary but will help keep the pocket pieces lined up in the next step. (no photos, sorry!)
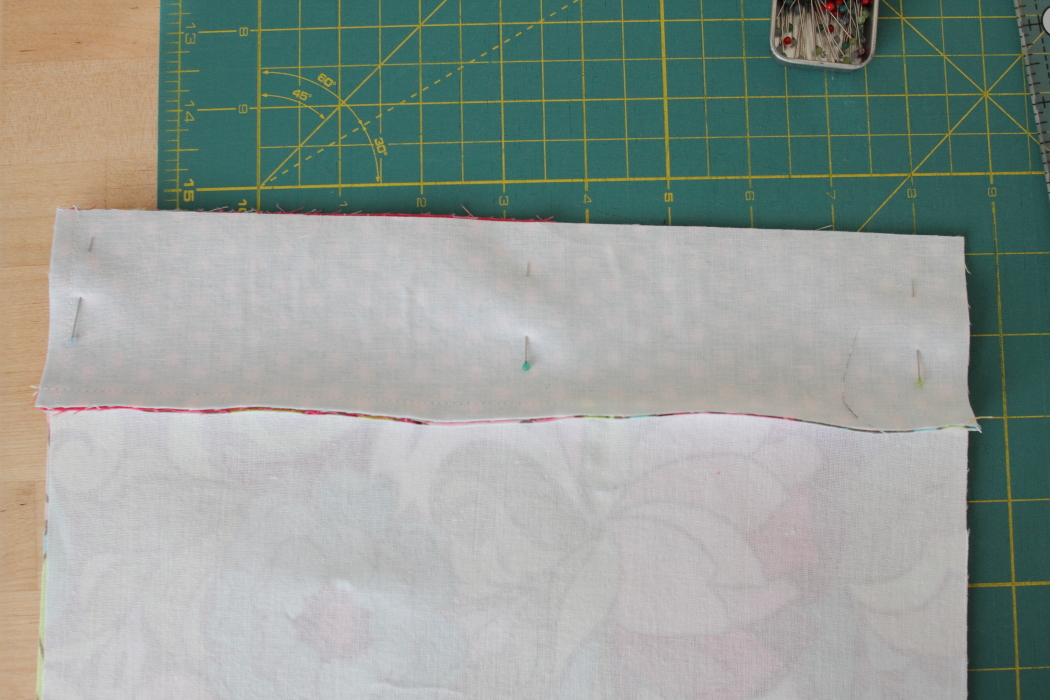
Step three: Prepare the front cover piece. Using a 1/4" seam allowance and with right sides together, sew the pocket pieces to the front cover pieces so the pocket is to the right of the longer piece.
You'll want to be careful to make sure that the pocket opening is up. Press the cover piece with the seams out from the pocket.
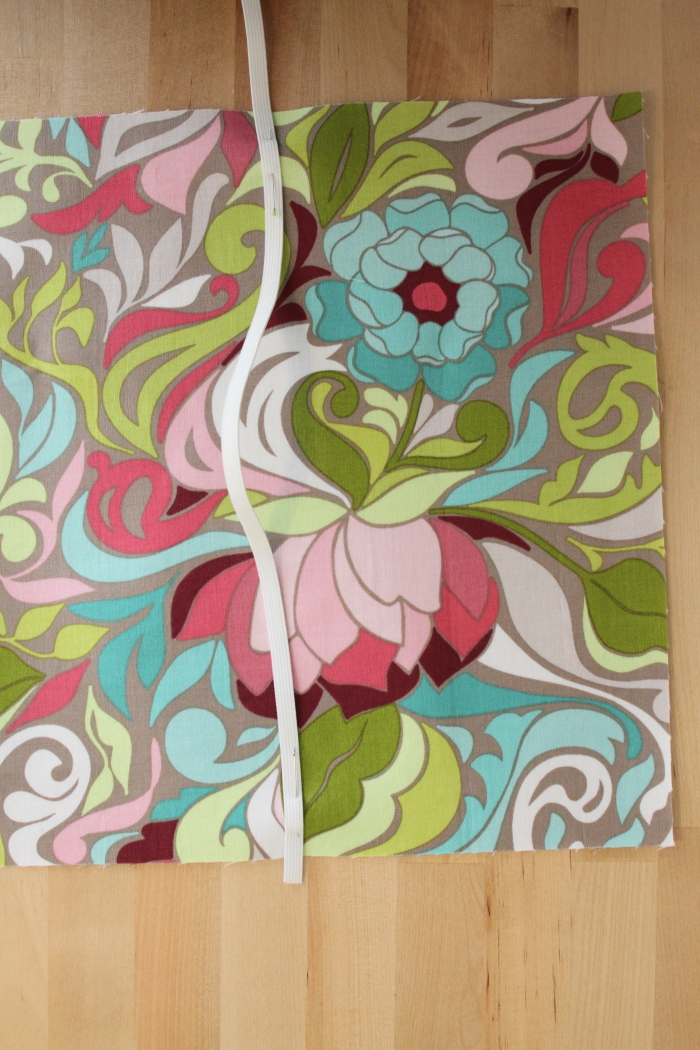
Step four: Pin the covers together and place the elastic. Sandwich the elastic inside the cover and pin it in place with 1/4" extending beyond the edges of the top and bottom of the covers. Pin it 11" away from the inside edge of the pocket.
Step five: Sew the cover together. Using a 3/8" seam allowance and with right sides together, stitch all the way around the outside leaving a 4" opening on one end.
Clip the corners (being careful to not cut the stitches) to reduce bulk.
Turn the cover right side out and push the corners out well. (Note that a 3/8" seam allowance makes for a comfortable cover with a bit of overhang around the notebook. If you would like to fit more snugly, and be more difficult to switch out notebooks, you can use a 1/2" seam allowance but must be careful to make sure it will fit before clipping corners and top-stitching.)
Press the cover well, turning the fabric at the opening in to the same seam allowance. Your cover should be about 10-1/4" tall by 24-1/2" long. If it's shorter than 10-1/8", you won't be able to top-stitch to finish it and have it fit, and 10-1/8" is really pushing it. Ask me how I know.
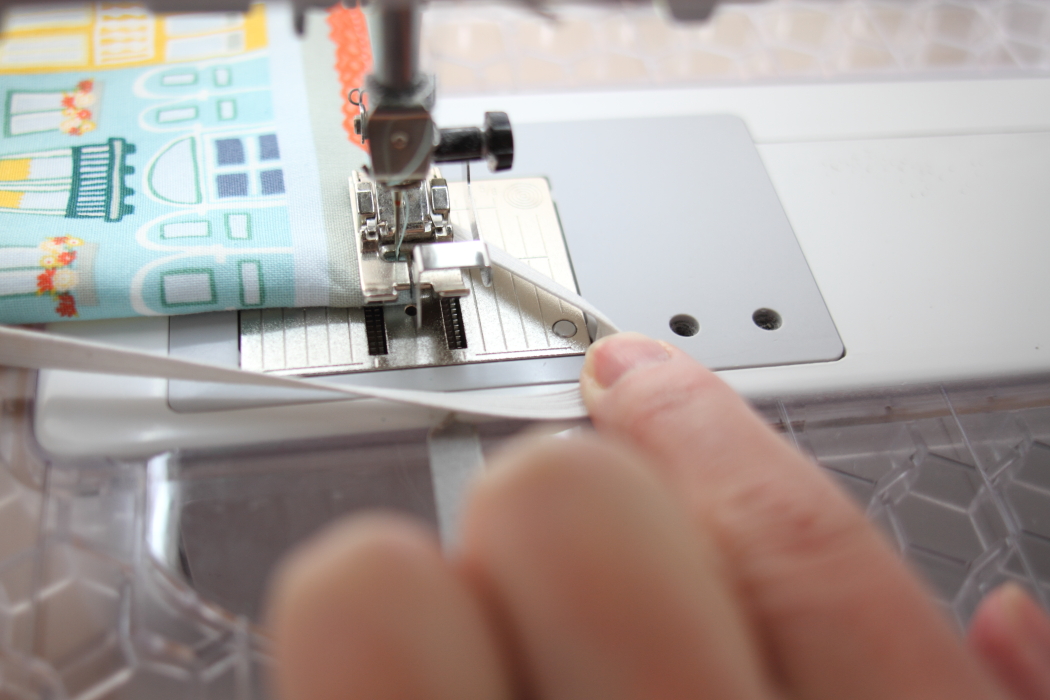
Step six: Top-stitch the short edges of the cover.
Step seven: Prepare the cover for finishing. Wrap the cover around the notebook you are using and fold the edges over the notebook cover, making sure they are as even as possible. Check on pocket placement and elastic placement. When you are satisfied, pin the edge and remove the cover. Repin the cover through the middle of the cover pockets.
Step eight: Top-stitch the cover closed. Being careful to catch both edges of the cover at the ends, top-stitch along the long edges of the cover only. Do NOT topstitch along the short edges. Carefully sew near the elastic, ensuring that you do not top-stitch through the elastic by holding it out of the way of the needle.
Clip your threads and wrap your notebook with your new cover! The notebooks that I bought were quite flimsy and I found they benefited from slipping in a piece of cardboard cut to size. I slipped mine in right behind the notebook.
These make fantastic and quick gifts. Who couldn't use more notebooks?