Friday, January 30, 2015

Fabric Friday: January 30

This week has flown by and I haven't been able to sew as much as I would have liked. I guess that's to make up for last week when I got a lot of sewing in, right? Hopefully this weekend I'll get some more in. I have finished sewing the squares to cut up for HSTs for quilt for my daughter. Since I finished my Spin Cycle top last week, it's time to start the top for the second daughter. I'm making Camille Roskelley's Lucky, but I didn't buy the pattern...I wanted to sew the HST triangles together the way I wanted to, and then I figured I'd probably change the sashing size anyway, so I figured why bother buying the pattern? If I weren't changing anything, I would have bought it, but I'm sure you can understand where I'm coming from...especially with a quilt make entirely of HSTs. :-)


Anyway, that's where I am this week with my sewing. And for Fabric Friday, I actually have a bundle I'm going to try to use! Most weeks, I pull just for the exercise of pulling. But today, I have a bundle I'm planning to use to make the Double Windmill table runner from Vintage Quilt Revival. My main living area and dining room have light blue walls and they meet up with light gray walls in the entry way, and we have a painting above our gray slate fireplace that is very orange, so I thought this combination would look really nice on my table. You know, I've never really been able to identify my favorite color. I used to say red by default because I look good in red. But, most of the fabric I've pulled for Fabric Fridays, and a lot of the fabric I've been buying lately, and a lot of the paint I've considered for my house has been blue. Of course, I really do love ALL the colors. Except maybe neon green. Or insipid vomit pink. But other than that, I pretty much love any color. It's color combinations that ruin colors in my opinion.

Enough rambling, onto the fabric! Top to bottom: Remix by Ann Kelie, Mormor by Lotta Jansdotter, Wallflower by Allison Harris, Benartex (no designer on my selvage),Simply Sweet by Lori Whitlock, Glimma by Lotta Jansdotter, XOXO Cotton + Steel Basics, Metro Living by Robert Kaufman, Miss Kate by Bonnie and Camille, and Quattro by Studio M.

Tuesday, January 27, 2015

Leaders and Enders

Do you ever use leaders and enders? To be honest, when I heard about leaders and enders, I thought it was a little too extreme. Chain piecing, I get. But, do you really save that much thread by using leaders and enders with your chain piecing? Or end up with something you really want after sewing all those leaders and enders? Then, I think it was in a book I borrowed from the library, someone wrote that she always has two projects going: one active project and one sideline project that is cut and prepped, and that she sews as leaders and enders. That sounded brilliant, and it clicked for me. So, I looked for a leaders/enders project of my own.

I really wanted to find a way to use my scraps, too. And, I had pinned this star quilt and really thought that would be perfect for me. I really love star blocks, and seeing it all fit together looked so cool! The book the block is from, though, has directions for making a 12-inch block, which meant working with really itty bitty pieces. I wasn't interested in that. So, I refigured out the block as an 18-inch block and realized that as an 18-inch block, it made a lot more sense! I could use blocks that were sized like charm packs and mini charm packs: 5-inch, 3.5-inch, and 2-inch. If you've ever flipped through the Scrap Therapy books by Joan Ford, these are the the sizes she recommends, and they make a lot of sense mathematically.


I made a trial block, and felt like it took forever; I wasn't sure this project was cut out to be a leaders and enders quilt. But, I gave it another shot as I worked on my Spin Cycle quilt, and couldn't believe how many I made. It gave me new hope, and I'm going to carry on with it. What's crazy is that with 18-inch blocks, I don't need to make that many. Sixteen blocks will make a whopping 72-inch quilt before adding a border!


I'm going to keep this strictly as a leaders and enders project for now; I have too many other quilts I want to make. But, hopefully I'll have a really fun scrappy quilt sometime in the next year or so. :-) And, one of my favorite parts is looking back at fabrics that I've used and loved.

I do wonder one thing. I can't decide if I should be trimming the backing or not. Have you made wonky stars? It hasn't seemed to add too much bulk to leave them on, I don't think, but do you trim yours? Sometimes, my points aren't quite big enough, so leaving the backing on helps me keep track of my sizing, but maybe I shouldn't be doing that. I'd love any tips!

I'm linking up to Lee's WIP Wednesdays over at Freshly Pieced.

Friday, January 23, 2015

Fabric Friday

Yay, it's Friday! Things have been chaotic around here; we are having our kitchen cabinets refinished! It has been a very long process, with many bumps in the road, and we are finally nearing the end.

Today, I'm expecting painters any minute, and they promised the lacquer would be smelly, so I sent my children to my mom's for a sleepover. Hopefully, that translates into some good, uninterrupted sewing time for me! Yay!

For Fabric Friday, I have a bundle I didn't really expect to work, but now I like it. I have just a few purple fabrics. I don't know if I've ever included purple in a quilt, it's a bit out of my comfort zone. So, I wanted to try to put something together to stretch me a bit. I instinctively grabbed the oranges to go with it, and the gray and aqua just to break it up a bit, and I really kind of like it. It's an unexpected combination for me, and I like that. I also really like the tonal range of these fabrics.


From top to bottom: The first doesn't have the designer on my part of the selvage, but it's by Benartex, then Glimma by Lotta Jansdotter, Simply Sweet by Lori Whitlock, Wallflowers by Allison Harris, Modern Herringbone by Joel Dewberry, Mormor by Lotta Jansdotter, (no selvage on this one, it was a fat quarter, but I'm pretty sure it's a print by V and Co.), and Happy Halloween by Lynette Anderson Designs.


Have a great weekend, and hopefully by next week, I'll have beautiful, white cabinets!

Monday, January 19, 2015

Tutorial: Paper Piecing

The other day, I decided to make a block from a book I got for Christmas: Vintage Quilt Revival, written by Katie Clark Blakesley, Lee Heinrich, and Faith Jones (love all their blogs, by the way!). I love flipping through this book, and I've been dying to make something from it! I decided to finally sit down and sew from it.

And, as I sat down to get started, I thought it would be a perfect opportunity to share my methods for paper piecing, since the book doesn't include some information I learned during a Saturday Sampler at American Quilting that I find really helps the process. American Quilting provides a great tutorial for paper piecing on their blog, just in case you have questions or mine isn't thorough enough for you.

Now, I have mixed feelings about paper piecing. I do really like it.
  • It yields beautifully accurate blocks. 
  • It also enables you to change the size of a block easily, and you don't have to do the math to do it! Aside from determining what percentage to copy or print the template at, that is... 
  • It also doesn't require precise cutting, since you'll be trimming everything up as you go.
  • You can make blocks with pieces that would be very tricky to cut out with a rotary cutter due to strange sizes or strange shapes.

But there are some drawbacks.
  • It dulls your needle. Like crazy.
  • It's pretty wasteful. I hate the pile of itty bitty slices of fabric that are left over. Yes, they're tiny, but when you think about cutting a 3 1/2 inch square that will end up being only 2 inches or so in  the finished block, it just feels super wasteful. Sometimes, I wonder about dramatically oversizing the pieces, but I haven't tried it yet.
  • It doesn't really lend itself to chain piecing. Especially for the early pieces in the center since you need to stop your stitches in the middle of the paper. You CAN do multiple blocks at a time, which I usually do so I can minimize my jumps up to the ironing board, but you have to raise your needle and pull the block out with each block. 

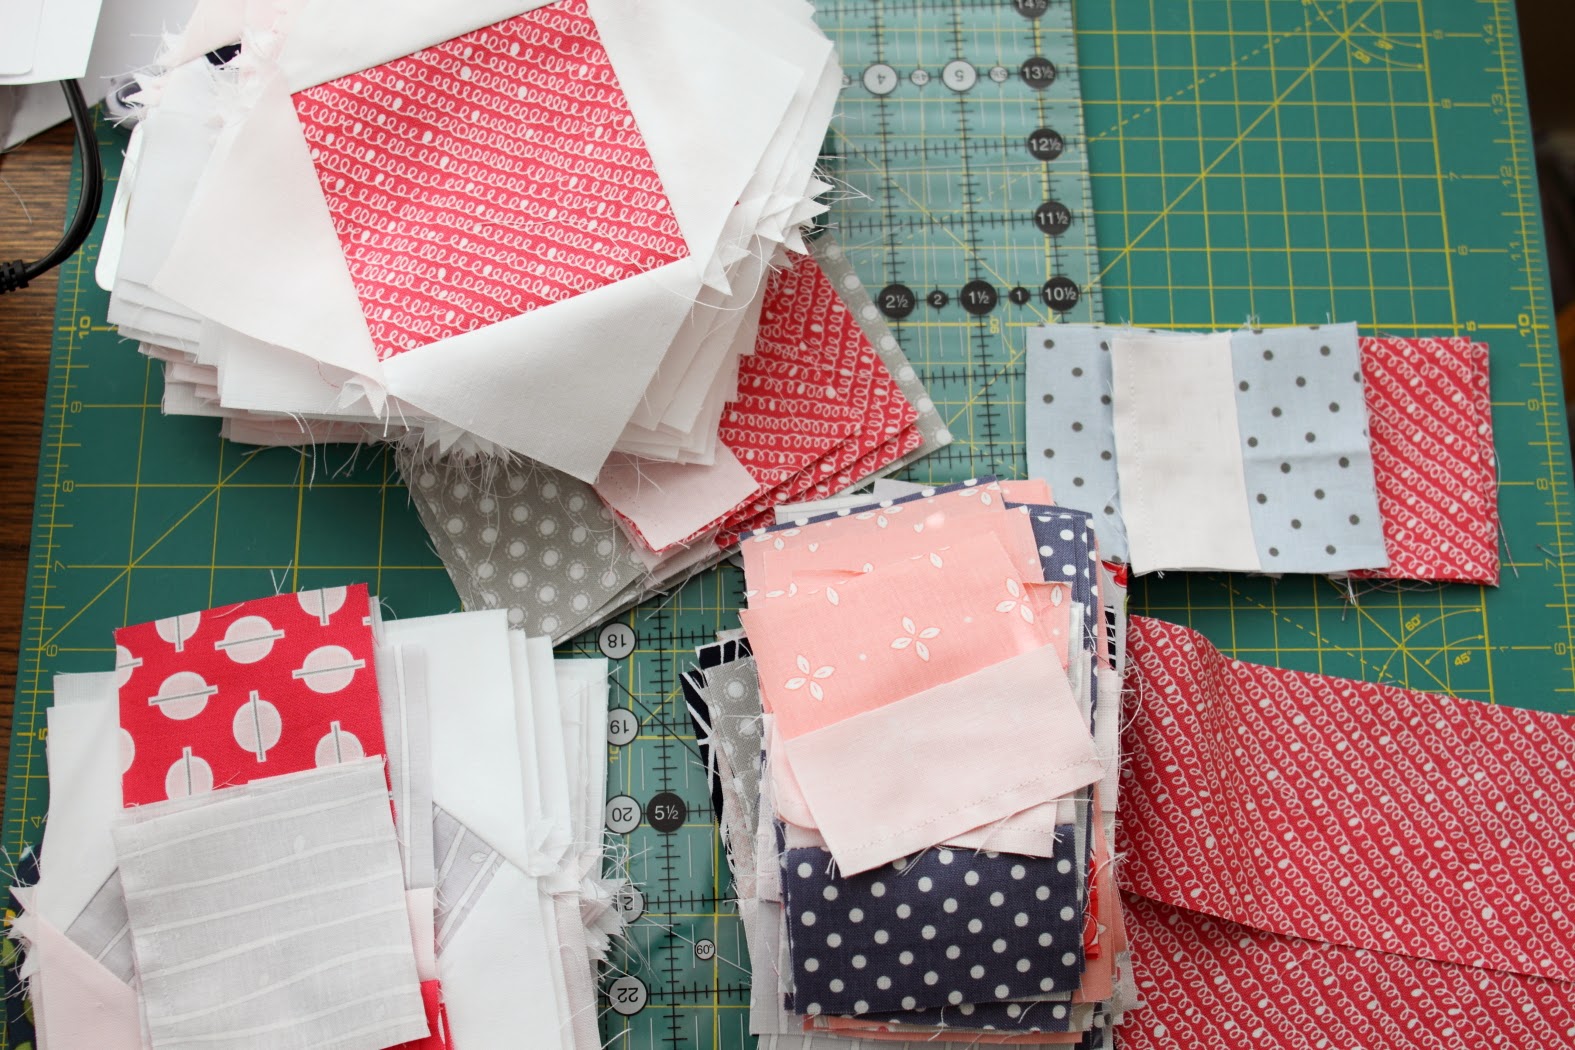
So, here's my way, that I learned from American Quilting. Now, I have to admit I am no expert! And, even while I was making this tutorial, I made mistakes. But, I hope you find these tips useful. Oh, and I made the Crosspatch block from the book with Kona solids from my stash while making this tutorial.

Step 1. Copy or print your template. If you are printing it, make sure you print at 100%, or actual size, NOT scale to fit. The Vintage Quilt Revival templates include a scaling inch mark which is so helpful to make sure your blocks end up the right size. Cut out your templates leaving 3/8 inch around the outside of the template.

Step 2. Crease your template. I like a thin, flexible ruler that has a quarter inch marking. It's perfect for paper piecing and I picked it up from American Quilting the day we did paper piecing for Saturday Sampler.


Line up the quarter inch line on the sewing line, with the quarter inch portion in the outside section (Ie: To mark the folds for section A1 (for the purposes of this tutorial, I'm assuming your template will be marked with A1, A2, A3, etc), the ruler should be extended 1/4 inch inside A2).


Continue folding out in order until you have folded each section. (No need to fold the outside) These folds mark where your seam allowances should be and help with trimming to keep your back nice and neat. It also helps you keep track of the direction you need to be sewing.

Step 3. Change your sewing machine settings. I like to use the straight stitch with the needle in the center so I can line up my sewing line with the center mark on my presser foot. Change your stitch length to 1.4 or 1.8. Check your tension by sewing a piece of paper with a couple layers of fabric.

Step 4. I like to secure the first piece (A1) with a dab of glue from a glue stick to the back of the template with the right side of the fabric up. The block will be face up on the back side of the paper when you are done.


 Make sure that your first piece extends beyond the seam allowance creases in all directions.


You can pin, which is what is suggested in the book, but I like glue. It will wash out, and you're not using that much. Glueing allows the pieces to lie flat together, while pinning (since you'd have to pin through paper) doesn't.

Step 5. Almost time to sew! Fold the crease between the first two sections.


Trim the excess fabric from A1 to the crease. (Excuse the fact that this photo is from a later section)


Take the A2 fabric and carefully determine how it is oriented. I like to hold the template up so I can see the light through it, and align the fabric that way, or you can visualize it on the front of the template to get the angle in your head and then put it on the back.


Flip the fabric piece onto A1, right side down, lining up the edge with the trimmed edge for the seam allowance. Make sure that it extends in all directions to cover the seam allowances.


Step 6. Carefully flip over the fabric and paper, keeping everything aligned, and move it to your sewing machine with the paper up. Double check your machine settings. Sew along the stitch line, making sure to start 1/4 inch before and after the sew line (these stitches will be in the seam allowances, so still important!). If you go much further than 1/4 inch in to the other sections, though, you'll have a hard time trimming for future pieces, so the closer you can stay to 1/4 inch, the better.


Step 7. Press. You will have to press toward the piece you just added, it's just the nature of paper piecing.


Step 8. Add the next piece by repeating the previous steps. Fold on the next crease, between A2 and A3 (sometimes between A1 and A3), trim the seam allowance, and align the next piece. Repeat until you have added all the pieces.


ready to trim

Step 9. Now it's time for the big reveal! Trim the block as directed by your pattern. Some patterns specify trimming 1/4 inch BEYOND the template, but I found with Vintage Quilt Revival, that they actually meant to trim on the solid line.


Notice that my pink fabric doesn't go all the way to the edge; this is why you need oversized pieces. This ended up being trimmed again because I misunderstood where they wanted you to trim. Also, as long as you remember (pin it or something) it's not the end of the world if it's a little short (but less than 1/4") as long as you remember that when you sew it all together in the end, since it will be in the seam allowance. Don't tell anyone I said that it's okay, though! ;-)

Step 10. Once it's trimmed, you're good to remove the paper. The short stitch length will perforate your paper substantially which will really help, but I find it helpful to also crease the stitch lines first. Carefully pull the paper away.


If you rush and pull too roughly, you could upset your stitches, especially if your tension was off, which is what I tend to do. :) If you have itty bitty pieces, it can help to use tweezers. That wasn't the case with this block, but I have done blocks that do need tweezers.


Step 11. Pat yourself on the back, you're done! If you've done a lot of piecing, switch out your needle, and don't forget to reset your machine settings!

Friday, January 16, 2015

Fabric Friday

I can't believe it's Friday already; thank goodness, right? I am ready for a weekend. But my Saturday is already full of (unrelaxing) commitments, unfortunately, so real relaxing will have to wait until Sunday. *sigh*

But, Friday. Yay! And it's time for another installment of Fabric Friday.


Here's what I have today. Apparently, I'm totally into blue right now. I just can't get away from it! :)

From top to bottom: First one is from Riley Blake, but my cut doesn't have the designer info on it. Hate that. Why don't they make the selvage information shorter? The second one is a fat quarter and I ended up with the non-selvage end... third down, though, is easy: Oh Clementine, by Allison Harris, then Mormor by Lotta Jansdotter, Road 15 by Sweetwater, Seaside Cottage by Heather Mulder Peterson of Anka's Treasures, Polka Party Petite by Holly Holderman, and Lucy's Crab Shack by Sweetwater.


I actually retook this group several times. First, I started off without an accent. Then I decided something orange might be nice. And as I was downloading those photos, realized that the cream fabric had turquoise trees, green grass, and pink trees. Now that I'm really looking at it, it also has orange, but I had picked a reddish-orange, not the burnt orange that is on the fabric. I decided pink might be better, and so I reshot again. C'est la vie. I do like the pink better. And, it's really how picking fabric goes, isn't it? You pick something, then put one back and pull a different one, and do it again, until you're satisfied.


See you next week, and I have my first tutorial lined up! It's paper piecing, which I really enjoy (but I'm not an expert, that's for sure!). Stop by early next week to check it out!

Wednesday, January 14, 2015

Organizing Works in Progress

Organizing a work in progress is always tricky. Hopefully, those works in progress don't become UFOs...but, if you have more than one going on a time, it can be tricky to maintain order. I don't claim to be an expert, but this is what I've found works for me.

My first rule of thumb in staying organized is to finish projects before I start new ones. I allow myself to have one long-term project (like a bed quilt or intricate pattern, or a more artistic quilt that takes thought) and one quick or urgent project, as well as a scrappy, in-between project (something like a leaders and enders project, one that's more indefinite). That's my first line of defense. And it usually works out really well. It also helps me maintain momentum; I have found that if I let myself start projects every time I get excited about something, I don't finish any because I don't maintain focus. Having the motivation to finish because I'm excited to start something new is helpful.


But recently, even though I kept my rule, I still found that I was really, really grateful that I had taken one other precaution. See, I started a quilt for my daughter's bed, knowing I wouldn't finish it right away. I had some sewing time free, but also knew that I'd be starting the amazing PVC playhouse within a few days. So, I started and got some good progress made, but had to shelve it for about two months (yikes!). By the way, the pattern is Spin Cycle by Allison Harris of Cluck Cluck Sew.


When I came back to it this week, I had to refresh myself on where I had left off, but because I had left it in such good shape, I was able to start sewing again almost immediately. Here's what I did, and since it worked so well, I'm going to try and keep all my works in progress in this state (as long as it makes sense for the project).

First, I cut out all the pieces I would need, with the exception of the borders. Now, I have one stray piece that I can't figure out where it goes. Maybe it was an extra (I hope!) but I'm thinking it will turn up as I keep sewing. For now, everything else is accounted for.

Second, I finished an entire step. This enabled me to keep everything organized and ready to pick up again.


Third, I kept everything neatly stacked next to my desk, but away enough to not be in the way.

I also packed away all my excess fabric (I mean it--all, even the background fabric) in a bag that I kept with the stacks, just in case. This means that if I made a mistake and need some extra, I don't have to go digging around my stash, or worse, hope I can find it again at a quilt shop.

So, go forth and keep your projects organized! And hopefully they'll turn into finishes and not UFOs! :)

I'm linking up to WIP Wednesday over at Freshly Pieced. Make sure you check out her blog!

Friday, January 9, 2015

Fabric Friday

This is the second installment of Fabric Friday here. I really think this is going to be a good exercise for me, and if you struggle with picking out fabric, I encourage you to do something similar.


This week, I wanted to use red. I've been doing lots of stuff with cool colors, and wanted to get something warm and bright going. But, it wasn't complete until I added the gray, to be honest. I had pulled out the red and orange and blue, and couldn't figure out what was missing. I added the yellow, and it was still just not there. I took a look over at Pile O' Fabric's bundles for some inspiration and noticed most of the bundles include a more muted neutral fabric as well. Gray it was! I love gray so much. Which is funny, because I used to really prefer brown as my go-to neutral. It's interesting how our tastes change over time.


From top to bottom: From Bump -> Baby by Gina Martin, Oh Clementine by Allison Harris, Ashford House by Paintbrush Studio (this one came from a local quilt shop, but is probably 7 years old; it was the very first fabric I bought!), Mixed Bag by Studio M, and Apple of My Eye by The Quilted Fish.

The Ashford House fabric isn't really my style anymore, (obviously, since everything else is more contemporary and modern) but I love it anyway. It reminds me so much of textiles I've seen in Southern France that I still just love it so much. It's interesting how our experiences shape our tastes and preferences. And, since it's such a simple pattern, I think it can fit in with the more modern fabrics I lean toward now.

Wednesday, January 7, 2015

Butterflies in the Garden

Another flashback quilt here...and another attempt at using up my stash and getting UFOs under control. I bought a bunch of fabric I fell in love with at Joann's...some of the first fabric I bought. I didn't have a project in mind, and I kept thinking it was perfect for my bedroom, which it actually ended up not being perfect at all. Nevertheless, I kept looking for the right project, but then I started buying better quality fabric...and this sat and sat.


I saw some pins on Pinterest that were pretty basic, and did the math myself to come up with something similar. The math ended up being really easy: I picked a size for some squares, and then added a small sashing strip between them, and cut rectangles to the size of the squares plus sashing on the long side and the size of the squares on the short side. By adding the same size sashing between the square row and the rectangle, it became a square again, perfect for piecing into rows. It was a pretty quick project, and it ended up being a pretty decent size. It's not a perfect fit, but it sits in our living room anyway, and I backed it with flannel so it's perfect to wrap up in when I'm sitting on the couch reading a book.


I didn't know what to call it, but I picked out a butterfly panto, and when I got it back, the greens and browns just reminded me of a garden. I'm not great at names for quilts, I'm really not.


This quilt was a huge breakthrough for me, though. I decided that the striped fabric would be the perfect binding, but I didn't have enough of it. I decided to do a narrow binding, using 2-inch strips, and just had enough. And what was interesting was that I loved the narrow binding so much more. It meant that my hemming on the back lined up better with the seam on the front. Instead of having a bad stitch line in the middle of the border on the front (okay, not exactly, but it felt like it!) and a wide flap on the hem on the back, I had a nice, neat hem with an occasional stitch on the binding on the front. I liked it so much better! I'll post more about binding later. I may even write up a tutorial, :-)


Approximate Completion: March 2014

Friday, January 2, 2015

Fabric Friday

Since starting this blog, I've been trying to think of a weekly "column" I could do that would be fun and interesting. Lee of Freshly Pieced hosts WIP Wednesdays link up party, I've heard of Tip Tuesday (who does that one? I can't remember...), Modern Monday over at 42 Quilts (I think she's done with that one, but it's still available)...I wanted to come up with something fun to keep me blogging regularly.

And then I thought about how much fun I have looking through Pile O' Fabric's bundles and thought it might be fun to do that with my own stash. Sort of an exercise to work on new color combinations, to get me thinking outside the box, and hopefully, to use my stash! So that's what Fabric Friday will be all about. A bundle (of any size; sometimes maybe just three fabrics, sometimes lots) from my stash. Luckily, I have a pretty decently sized stash. :-)


This week's bundle is orange, navy, and aqua. Definitely inspired by my current work in progress, but not the same.


We have (top to bottom) From Bump -> Baby by Gina Martin, (? I bought a fat quarter of this, but my end didn't have the selvage), XOXO in Navy by Cotton + Steel (yes, it's navy and not black), Simply Sweet by Lori Whitlock, Modern Herringbone by Joel Dewberry, and Quattro by Studio M (which I am using in my current WIP).


I've been really digging geometric basics lately, and most of these are fabrics I've purchased in the last few months.

I think this would work well with either a white or really light gray background.

Thursday, January 1, 2015

Back to Sewing

This is my first WIP back from Christmas. Well, I guess that's not technically true…I still have my girls' quilts that I'm in the middle of…but this is my first start after Christmas. My friend is getting married, and with a deadline, I wanted to get going. My girls' quilts need to be done, but can wait.

When my friend, who was a roommate in college when I was dating my husband, emailed me to tell me she was engaged, I was so excited for her! And one of the first questions I asked her was what her favorite color/color combination was. She didn't ask why, thankfully, and said navy and yellow.


I rummaged through my stash and found a great stack, and then went to work finding a pattern. I looked through my new books I got for Christmas (A Quilter's Mixology, Scraps, Inc., and Vintage Quilt Revival. Love all of them!), and settled on "Petal Pushers" from A Quilter's Mixology.


She lives in a different state, and I wasn't positive of her tastes, so I didn't dare get too modern or too patchwork. Petal Pushers looked clean and contemporary, without being overbearingly modern. It seemed perfect, and sizing it down to a lap quilt would be easy. The only problem was it required more than a half-yard of any one fabric unless I wanted to do it scrappy.

Which I didn't. A big part of the beauty of this quilt, in my opinion, was the simple color.

Back to the fabric store…(darn) and I settled on a navy quatrefoil (Quattro by Studio M), yellow polka dots (Social Club by the Comstocks), and an aqua houndstooth (Trendsetter by Fancy Pants Designs). I'll use Kona Ash for the sashing and border. It's my favorite gray and non-white background. I've probably bought at least a bolt by now :-)


I also bought template plastic from Joann's. I don't have a ton of experience with template piecing, but I did want to try something more durable than card stock, since there are several patterns in the book I want to try.

And I'm excited to try some more curved piecing. I've done some improvisational curves from a pattern from Jacque Gering's and Katie Pederson's Quilting Modern, and I've experimented a little with an art quilt I made, but I have not made drunkard's path blocks before. I have to say that Angela Pingel's method was so simple. The first couple of blocks were a little awkward, but before I knew it, I was piecing pretty quickly.


After a few, I did find that I liked using 3 pins instead of just one in the center. Pinning the two ends helped me get going just a little quicker. But, sewing from each end to the middle was surprisingly effective.


Here's a pile of my finished curved blocks, ready to be pressed and trimmed! Since I'm sizing it down, I didn't have that many to make; I think 24 in total.


And tonight I got them all trimmed up. I had just one or two that ended up being off, but I think they'll be okay.

I'm surprised at how quickly this quilt is going together!

Update: I'm linking up to WIP Wednesday over at Freshly Pieced. Love her blog so much!