Friday, December 23, 2016

Fabric Friday: December 23

I've been dreaming and scheming about a sampler project as a tribute to my love of travel for a while. I got Elizabeth Hartman's Patchwork City book last year and thought it would be the perfect thing to use, and have hesitated to start for just a couple reasons. I was pretty intimidated by template piecing--I've used rotary piecing almost exclusively since I began quilting. Everything else that stood in my way was mostly related to laziness--I didn't have the templates prepped, I didn't have a block picked to start, I didn't have fabrics picked for a block, I had plenty of other projects, etc, etc...it was all stalling because I was intimidated. But! I have decided to go for it.


I've been acquiring cute travel prints for a while, and I couldn't resist the canal print from Kate Spain's Grand Canal line. But--I ordered it from Fabric.com with some other things, and so of course I ended up with a full yard due to their terrible pricing model on quilting cotton. I cut some off to make a notebook cover for my travel-loving sister, and decided that the scraps left from that cut would be perfect for a first block. But what prints to use with it?


I struggled at first with pulling coordinating prints for her notebook cover and ended up using solids. So when I decided to use the scraps for a block, I again had to consider coordinating prints. And I ended up with two separate stacks that both work equally well. I thought I'd showcase both of them here for Fabric Friday just to show how different two stacks that coordinate with the same focal print can be. Honestly, I can't even decide which one I like better, so I'll probably use both in the quilt.


I used a metallic print in both stacks and I think that complements the idea of Venice really well. Venice is so rich, and steeped with a history of wealth, that I think it works on a theoretical level. I did find that I had to be really careful with the blues and aquas because of how much of them there are in the background of the print. That was what I really struggled with when I was sewing the notebook cover. It needs good contrast so that the piecing is distinct.


So, as I was taking pictures of these stacks, I put them together, and realized that they make a really nice single stack, too! *sigh* I feel another quilt coming on!

Tuesday, December 20, 2016

Moda Sampler Shuffle

Several months ago, I got a hankering to start a sampler project, and settled on the Moda Sampler Shuffle. The quilt along was long over, and I had saved the block patterns during the quilt along, but Fat Quarter Shop has maintained the patterns on their blog, so I used their site as I sewed. I finished all the blocks just a few days ago, and while I'm not finished with this quilt project (I plan to add more blocks to make it a more sizeable quilt), it's always fulfilling to reach milestones!


You may notice a few blocks missing from my lineup. That's completely intentional, but I still finished with 30 blocks. Two of the blocks were applique and that wasn't what I wanted for my project for a couple reasons. First, and maybe most importantly, I hate applique. I'll do raw edge with fusible in certain instances, and I'll do wool hand applique, but I just don't enjoy needle turn or other hand-sewing methods. So, I avoid it. And second, the blocks really weren't the style I was going for. I wanted my quilt to look more contemporary, and the applique designed blocks are very traditional. No thanks. So, I skipped those and don't feel one bit guilty.

I did end up with 30 because I messed up on one, but liked the finished block, so I have two from that pattern (the chevron block), and I chose to remake one because it didn't turn out like I wanted and I wanted to try it again in a different color layout. I'm really pleased with how the second turned out. But, since there isn't anything really terribly wrong with the first, I'll include it too. So, 30. From 28 patterns.

I think I'll add blocks from the Splendid Sampler that's going on now (and from which I'm dutifully downloading patterns), but I'll surely skip any applique there, too. And I might just remake a few from the Sampler Shuffle in different color layouts. We'll see. I have a whole box full of scraps I pulled for this project that didn't seem to get any smaller. For now, I might take a bit of break and prep a new leaders and enders project because I'm out of my current one. There are always plenty of projects, aren't there?

Friday, December 9, 2016

Fabric Friday: December 9

We're here at another Friday...another week gone, another week closer to Christmas...and no progress made on my Christmas sewing for my girls...it's really tough now that they're older. My oldest, who is almost seven, stays up until 9:30, and by then, it's too late for me to pull out a sewing project and start. But--we have a neighborhood sewing night coming up on Tuesday, and I'm hoping that if I can get everything cut out, then it'll be easier to pull out when I have a few minutes here and there. We'll see.


I pulled this bundle out last week when I pulled my Tuscan bundle. I'm so drawn to navy and aqua right now, I just love them. I wanted to add a pop of something, and I tried orange, but I like these pinks better.


I'm knee deep in my Shimmer quilt, and I'm still working on my sampler project, so I don't really need a new project just yet, but pulling fabric is sure fun!

Monday, December 5, 2016

Cutting Up My Kona Color Card {Tutorial}

Over the summer, I bought Amy Ellis' pattern for her Majestic Mountain mini quilt. I HAD to make it, and I'm so pleased with how mine turned out! But picking the colors was no easy task. I had a Kona color card, but it was so difficult to pick colors that would work together from the tiny swatches that were so far apart from each other on the card! If you have a color card, I'm sure you know exactly what I'm talking about. You do your best, but in the end, it's just impossible. This was the first time I was needing to use it to pick solids to go together instead of picking solids to match fabric I already had, and it proved too much.

So, I cut it up.

I know a lot of people have done this, but I was nervous and I wasn't sure how I wanted to store it exactly. I was worried about losing swatches, and I was worried about finding the easiest way to use them. I know lots of people punched holes in them and strung them on a chain, but the swatches are so small already that I didn't want to punch a quarter inch hole through the color. And then I saw a post on the Anything Pretty blog. She cut hers, mounted them on velcro and stuck them on a canvas. I thought it was brilliant! I didn't have to punch a hole in them, and it seemed like a great way to store them: as decor. It would be one less thing I need to find a place for me in my cluttered sewing room.


So, first things, first. I didn't find a whole lot of great tips for how to do this, so I thought I'd really spell it out. After all, "cut it up" seems like directions, but what's the best way to do that, really?

I don't know if the way I did it is the absolute best way, but it worked well for me.

I started with a dull rotary blade and used my rotary cutter and quilting rulers to cut it. It was hard, I'm not going to lie, and I did it over several days because it put a lot of strain on my hands. But, doing it this way meant that I got really straight cuts, and I imagine it was easier on my hands than scissors! Note that because the swatches aren't all the exact same size, you need to do rows individually. No short cut here--every piece has to be cut out. I cut rows the width they would end up (a fraction below the name) and then cut the strips into pieces.

Next, I bought rolls of velcro with adhesive backs so I wouldn't have to glue. I bought 3/4" wide velcro and I found it at Lowe's. Again, I think "stick velcro on the backs" isn't very helpful, so here's exactly what I did. I tried peeling the velcro and then cutting it, but this gummed up my scissors a lot faster than when I cut the velcro in pieces with the plastic still on. So, do that. I found that it was easier to keep the velcro from tangling up by separating the two sides of velcro, which come next to each other on the same piece of plastic. Cutting it apart was pretty quick, and then you can set aside the half you're not working with. And, I elected, like Anything Pretty, to put the loop side on the back of the color card pieces so that if I put them on fabric I won't risk the hook side snagging my fabric.


Last was the trickiest part for me: applying the velcro strips to the canvas. I cut a tiny bit off and stuck it to the back to test the adhesive, which seemed pretty strong to me while I was putting it on the color swatches, but the next morning, it pulled right off. This very likely might have been due to the face that I used a tiny piece, but I wasn't wiling to risk it after all the work I went to since I reasoned it could be due to the uneven and flexible surface of the canvas. So, even though the velcro had adhesive on it, I used glue, too. I didn't want the strips to peel off when I pulled color chips off.

I bought a 24x36 canvas from Joann's when canvases were 50% off. It still ended up being $25--this is not a cheap project! I used blue painter's tape to create a 1" border around the canvas to keep my strips even, and then I marked my strips with pencil and my 6"x24" quilting ruler to make sure they were evenly spaced and level. Make sure you use a light pencil line--after I glued down a few strips, I went back and erased the lines so they were fainter because you can see the pencil through the velcro. I spaced the lines apart by 2", so the strips are closer than that since the swatches are over an inch tall.

I started by finding the middle line and then measuring out from there--you'll need 13 lines total. And for the glue, I used E600. So far, it's holding well! I found a package of single use tubes at Target of all places, and bought that even though I had a large tube at home. My large tube was several years old and I knew it would be difficult to squeeze it out evenly.


After glueing the velcro down, I spent a bunch of time sorting the color swatches, but that part was fun, as I'm sure you can imagine!


I'm really happy with how this project turned out! I love that it's a prominent piece in my room and that I can see it all the time. I love playing with the color chips and picking out new color combinations. It worked out really well, and if you're looking for a way to cut up your card, I'd definitely recommend it!

Friday, December 2, 2016

Fabric Friday: December 2


It has been way too long since I posted a fabric bundle. I posted last about fabric way back in February! I pretty much abandoned it during my first trimester when I was SO exhausted. And fabric kinda made me nauseous....yes, that's an awful feeling. But, I'm feeling much better and spending a lot more time in my sewing room. One day last week, I got a hankering to pull some fabric. I pulled two bundles, not exactly sure what I was going to do with them, but anxious to pull. It's therapeutic to sort my fabrics, selecting stacks that would work together. So, this bundle is inspired by our trip to Italy a year and a half ago, specifically Tuscany. I went back and looked for a specific photo that had inspired it, but didn't really find one: I think after looking through them all, it was more of an impression I had. So here's a couple pictures that contributed. :-)


Not exact colors, but they do give the feeling I remember from Tuscany...


When I think about Tuscany, I think of sienna and butter yellow and grass green with pale blue skies and purple and pink flowers. Washed out, almost neutral colors. It's a beautiful palette. These aren't pale, per se, but it's lovely. And I can't wait to return to Italy. It was a beautiful vacation, and one of the best parts was all the delicious food, especially since I ate so extraordinarily well and didn't worry one bit about food safety for my Celiac Disease.


And I seriously need to find a great pattern to use these in!

Monday, November 14, 2016

sampler shuffle update

I've been sewing a lot more lately than I expected to be able to! Some days, there just isn't time, but I've been surprised at how much I have been able to do. I've gotten my pieces cut out for my Shimmer quilt (pattern by Allison Harris) and I've sewn together 3 blocks, and I've gotten some progress made on my sampler. I've finished 23 blocks so far, so it's coming right along!


I'm using the patterns from the Moda Sampler Shuffle. I'm planning to omit the appliqué blocks (I don't love appliqué, and I don't think they're the style that I want), and I made one twice because I messed up. The one below on the right was my first go, and instead of sewing the components in two different orientations, I sewed them all the same way. I like it, though, so I finished it up and I'll use it. And then I had the idea to do the chevron block in an ombre-esque style, and I like how it worked.


Here are a few others I've finished and really like.


I decided to change the layout on this one; the quarters in the original all face the same direction. I like how it turned out.


Before I started this project, I pulled out a pile of scraps to use. I wanted to limit the color palette to give it a cohesive feel without using a single fabric line. I wanted it to look scrappy but not too mismatched. I think it's working out. But I'm really surprised at how I really haven't made much of a dent in the scrap pile I pulled. Which is fine, of course. But I expected to bust more of my scraps! :-)


I really like this one, too, and it reminds me a lot of one of the quilts I made for my babies.


I still haven't decided how many blocks to make, and I'll pick up with The Splendid Sampler project organized by Pat Sloan when I've finished the Moda Sampler Shuffle blocks. And I haven't decided whether I want to lay them out on point or horizontally. I've never done on point, so a part of me wants to just so I can try something new. We'll see!

Thursday, November 10, 2016

Majestic Mountains Mini Quilt

I grew up here in Utah surrounded by beautiful mountains. I went to Olympus High, named not after the Greek Olympus, but after Mount Olympus on the Wasatch Front (okay, okay, so our mountain was named after the Greek one...). We had a great view of it from our front yard, and it's a central feature of the landscape of my childhood. No doubt this was due to my dad's love of the mountains. He loved the mountains. For him, it wasn't only that he appreciated the beauty of the mountains, but also that he felt God in the quiet of the mountains and appreciated the beauty of God's creations most while he was there.
This summer, my dad died. He had suffered for 9 long years from a neurological degenerative disorder and he finally died two weeks after having a mild stroke. It was heartbreaking, of course, and made even more difficult by the fact that I was pregnant with twins. I was a hormonal, emotional wreck. I was around 25 weeks when everything happened, and by that time, I was already struggling to get around. I yearned to mourn by retreating to the mountains, to honor his memory by hiking in his beloved mountains where I knew I would feel close to God and to him. But, my body wasn't in any shape to allow that. I was able to drive up the mountains a few times for picnics, but it was painful physically and just wasn't exactly what I had hoped for.


Around that time, Amy Ellis posted about her Majestic Mountains mini quilt and was in the process of developing the pattern. I had, for years, been searching and planning various ways to make a quilt to honor my dad and everything he gave me, and had never settled on what I wanted. I had wanted to make it before his death, but couldn't settle on a design. When I saw Amy's design, I knew it was what I wanted. It was modern enough to hang in my living space. It looked enough like mountains without being too pictorial. It was perfect. I ordered the pattern as soon as the sale went live and turned to my Kona color card to pick colors, hoping that sewing something in his memory would provide a way for me to properly grieve.
It was so much harder than I expected to pick colors from the color card, and I determined to cut up my card before I picked colors, which helped a lot. Maybe someday I'll get around to posting about that. I got my yardage ordered and set about sewing it. The pattern is paper pieced, and my only gripe with it is that she didn't specify any cutting instructions. I found this difficult to work with and ended up just cutting tremendously oversized pieces because of the sharp angles. I used my scraps to piece an improve backing. The top went together pretty quickly because there aren't very many pieces, and I loved it. But I couldn't figure out how to quilt it, and by that time, about 30 weeks, I wasn't even able to get to the store to pick thread. I was really in bad shape, and basically on bed rest (self-imposed). But, the whole process had really been therapeutic. I set it aside while I considered quilting, not really in a rush to decide because I didn't have any thread nor way to get any.

I delivered my babies the day before my birthday (yep, I got to spend my birthday in a hospital bed, hobbling around from my recent surgery), and my husband surprised me with an Aurifil color card! I'd never even sewn with Aurifil before, but I was pretty happy. It was a pretty thoughtful gift; he knew the only thing holding me up from quilting this mini was my inability to go buy thread.


A few weeks later, I had selected thread colors and finally settled on a quilting idea, and once it came, I got to quilting. It's funny that the actual sewing of this project was really so fast, but I spent months on the project due to my inability to make decisions. I decided to quilt the sky with horizontal wavy lines with swirls and loops to represent wind, I quilted pebbles on the rocky mountain side, and I quilted vertical lines (really long vertical zig zags) for the grass.


I bound it up and hope to get it hanging on my wall soon. I like to think that my dad would like it; in any case, I think he would appreciate the tribute. He was always a creative person and I think he'd appreciate that I used my creativity to create a mountain design in his honor. Truth is, I miss him terribly, even though he hadn't been himself for quite some time. He was a great man. And his death brought back all the grief we had experienced over the course of his illness.

Until we meet again, Dad. All my love.

Thursday, October 20, 2016

Double Windmill Table Runner

So, in case you didn't know, I had twins! They arrived a tad early in mid-September. Towards the end of the pregnancy, I was increasingly sore and fatigued--imagine that! It was hard for me to do anything besides sit in bed all day. As you can imagine, I wasn't sewing much toward the end. I did a few things, here and there...sewing really is therapeutic for me. But, I just didn't have the stamina or strength to sew for more than a few minutes at a time.

After I delivered, I felt so much better and was itching to get back at the machine. And I realized that I had really made a mistake before delivering. I was determined to leave my sewing room in as good a shape as possible, and in my mind, that meant leaving as few WIPs as possible. What I didn't count on, though, was that without WIPs, I didn't have projects to jump right back into when I was ready. I did have a couple: my sampler project being a big one. I also had plans for a fall-colored version of Allison Harris's Shimmer quilt, but my progress on that was limited to picking fabric and sewing one practice block. I had nothing cut out. I had a Majestic Mountain mini quilt (designed by Amy Ellis) pieced and waiting to be quilted, but I couldn't get to the store to select thread (my sweet husband fixed that by buying me an Aurifil color card for my birthday).


I didn't have anything prepped to jump right into. Which proved to be a major bummer because I didn't have a ton of time to escape to my sewing room, I really only get 20 minutes or so at a time. One day, while flipping through some of my favorite quilt books, I came across a pattern in Vintage Quilt Revival that has been on my list for a long time. It's a cool table runner, but I've never been able to figure out what colors I wanted to use. Looking at it that day, though, I realized how great it would be as a Halloween table runner.


That afternoon, I auditioned some fabrics and printed the paper piecing pieces. The next day, I sewed the paper piecing together, and got the blocks sewn together the day after that. It went together so quickly, which is a huge benefit of sewing table runners! I elected to do wavy lines for the quilting, and that took a few days, but I had the table runner totally finished, including binding, just over a week after I started. I love the quick return on investment you get with mini quilts and table runners.


I really love how it turned out, even though there are few things I would have done differently. And it matches the Halloween banner I made last year. :-)


Monday, September 26, 2016

Holiday Banner {tutorial}

My oldest daughter has accused me of a being a Grinch because we didn't have any Halloween decorations. She's probably right...I don't put headstones or skeletons in the front yard, I didn't even have a wreath until last year. I did have a Halloween quilt, but it's a bit big to hang on the wall, so it just lays across one of the chairs. But, that's been it.

I thought that was good enough. 

But, I understand kids like to be festive. I sure did when I was their age. I went fabric shopping last year a few days before Halloween, looking for some very specific charm packs, and while I didn't find them, I did find that my local shop had their Halloween fabric on sale for 40% off. I picked up a couple cuts and planned right then and there to make a Halloween banner, like a birthday banner I made a few years ago.

And, I thought, since it's a really easy project, that I'd share here how I make banners! I know there are faster methods, but I like mine to be really finished. Quick, lightweight banners don't often have finished edges, and I like mine to be durable. It doesn't take that much longer to make them right.

Before I get to that, though, I wanted to point out two tools that I used with my second banner that made it so much easier. They aren't essential, and I certainly wouldn't suggest you go out and buy them for this one project, but I love them and they make a lot of projects I do a lot easier. And, no, this isn't a sponsored post in anyway, nor are any links affiliate. I just wanted to share about my tools.

The first is my Silhouette Cameo. I struggle with it, to be honest, but on the whole, I'm pleased with it. It doesn't always make perfect cuts like some people will have you believe, and I'm sure part of that is me and not understanding the settings. But, it does a pretty darn good job and it's far better (and easier) than anything I could do with a pair of scissors.

The second is my Bernina Top Stitching Foot, #10. I use this foot so much. I just love it! It helps me keep my stitching close and even. I use it anytime I want to be a little more precise, even if I'm not technically "top-stitching." 

Now, onto the banner!

First, decide what style and size you want. My birthday banner uses triangles that are 9 inches tall, and for my Halloween banner, I decided to use 5x7 inch rectangles. Think about your space and where you'll hang it. My birthday banner is probably a little big as it hangs down a little low where we walk. Also make sure to think about what you want it to say. Happy Birthday and Happy Halloween are what I picked, but for Christmas, you could pick a lot of different phrases. Happy Holidays, Merry Christmas, Peace, Ho Ho Ho, Joy (that one would be super quick!), or anything else you could think of. 

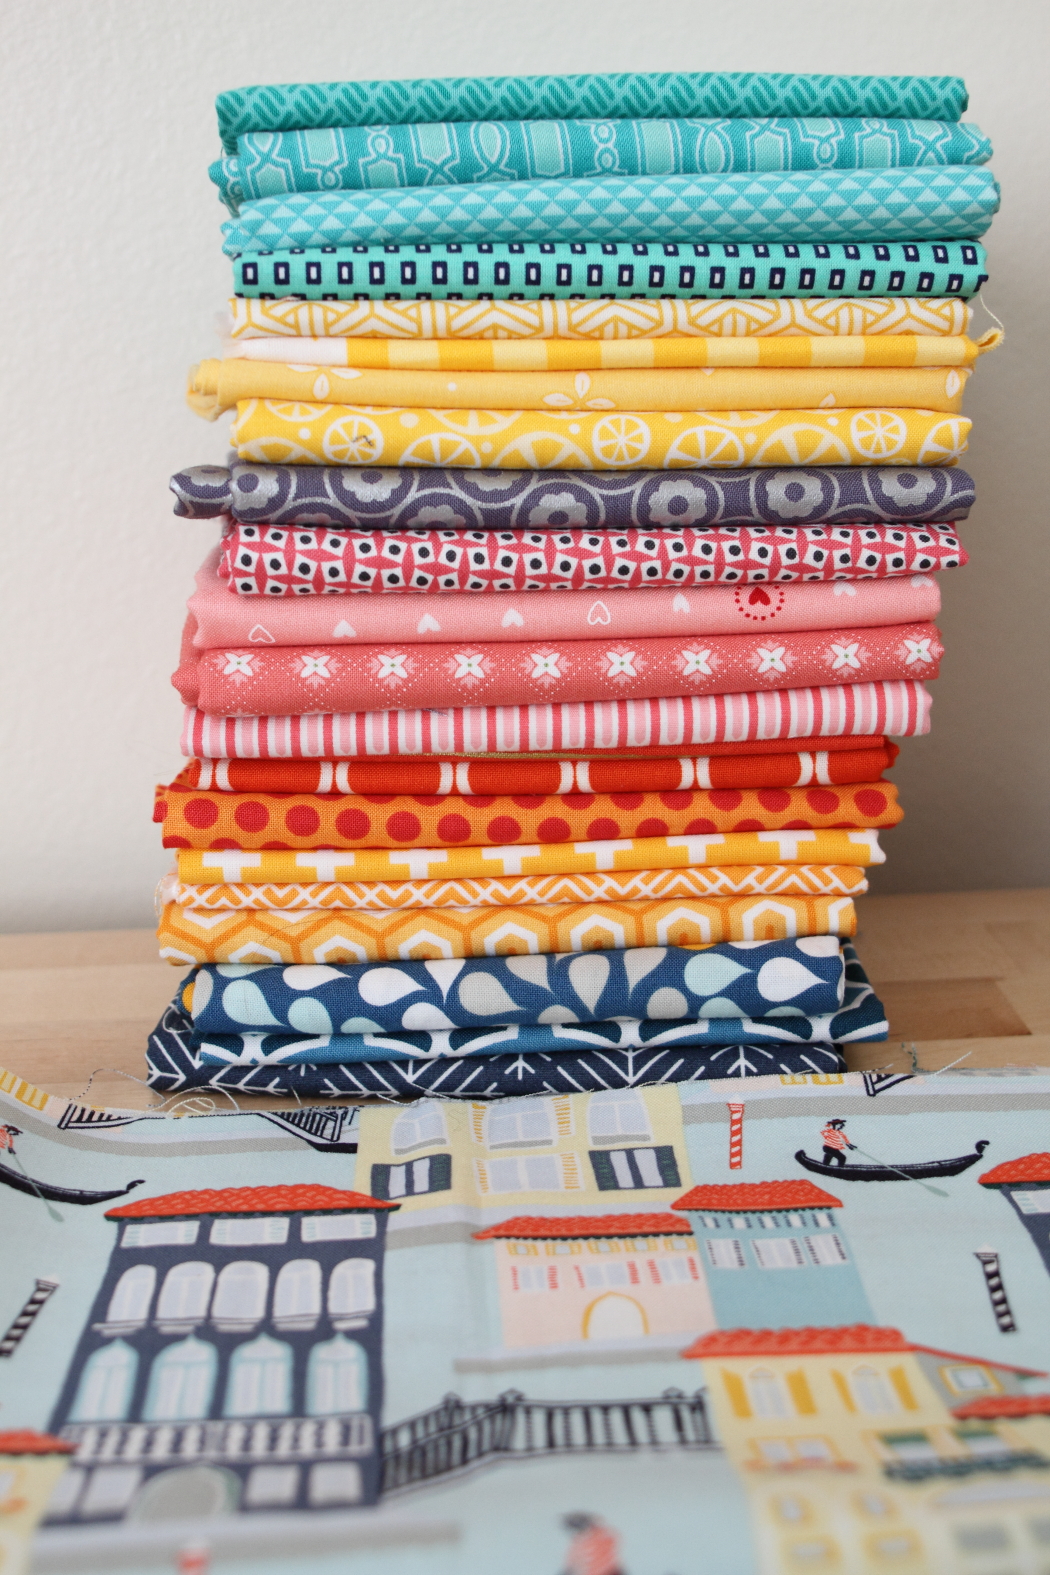
Second, pick your fabrics. If you have a stash, this is a great way to use it, as you'll only need a little bit of fabric. I opted to get 1/3 yard cuts of the new prints I bought because I wanted to make sure I had at least 9-1/2 inches and sometimes the cuts get wonky. I always buy slightly more fabric than I need, just in case. But really, depending on how many prints you want to use, you really only need around a 6x8 inch piece of each. Perfect scrap buster. Cut out as many as you need, plus a backing for each. The backing can be plain as it shouldn't be seen if you hang it on a wall. I cut out 16 5-1/2x7-1/2 pieces for my Halloween banner and 16 backing pieces.

Third, pick your font and your lettering fabric. When I made my birthday banner, I printed out the letters from my computer and then traced the mirrored image onto fusible interfacing, then cut them out by hand. For my Halloween banner, I used my Silhouette Cameo and cut them out. You'll want to make sure that your lettering fabric has a good contrast to your banner fabrics so that your lettering will be visible (I missed the mark on a couple prints in this banner). Keep in mind a few things when you pick your font. It should be wide enough to top-stitch on, and if you're cutting it out by hand, you'll need something that you actually can cut out. I like to go for chubbier fonts so they are easier to work with, and so that they will be more visible on the banner.

Fourth, fuse the letters to the banner pieces. I measured up from the bottom and tried to center them as best I could, but since it'll be hanging and they won't be lined up and scrutinized, don't fret too much over this.

Fifth, topstitch the letters down. Technically, this is optional, but I like to make sure what I make is durable. If you're going to take the time to hand make something, you should do it right.

Sixth, sew the banner pieces to the backings along two sides and the bottom, right sides together. Leave the top open.

Seventh, clip the corners (but not the stitches!) to reduce bulk. Turn the pieces right side out and press.

Eighth, prepare your bias tape. Determine how long you want your piece(s) to be and cut enough 2-1/2 strips to be that length. I decided mine needed to be 120 inches for the longer one and 110 inches for the shorter one. You can always trim this down if it's too long, but it's more irritating to try to make it longer, and it needs to be long enough to have a couple feet of excess on either side of the banner pieces so you have room to tie it. Sew the strips together, ensuring the right sides are all on the same side of your strip, and press the seams open. press the two short ends in so the raw edges will be enclosed. Press the strip in half length-wise. Open it, and press both long edges in to the center pressed line. Refold the tape and press well so that the raw edges are enclosed. 

Ninth, Find the middle of your bias tape strip and the middle of the banner pieces. Working from the middle out, pin the banner pieces into the bias tape. Once you are happy with the position, take the banner over to your sewing machine and top stitch the bias tape closed, making sure you catch all the edges.

And you're done! Not too bad, right? And what you have is a banner that can be used for many, many years to come. I've pulled out my birthday banner for numerous birthdays for the past 4 years, and it looks as good as the day I made it. There won't be any frayed edges to worry about, or fusible peeling off. 

Friday, August 26, 2016

Terrazzo Quilt

I cut out the pieces for this Terrazzo quilt last year, and never got around to sewing it. Part of that was because I never took the time to prep my paper piecing pieces, but the other part was that other projects kept taking priority. And you know, then I got pregnant. And exhausted.


When I found out I was having two girls, I decided to use the Terrazzo quilt as one of the baby quilts because I had all the pieces for the top cut out except for one print, and the colors I picked worked for a girl. I didn't realize how much bigger it was than I needed until it was really all together, but in my mind, bigger is almost always better when it comes to quilts, so it doesn't bother me.


I really love this pattern and how the blocks work together to form the design. And because all the cutting was done, it really didn't take long to finish the top, though it took longer than the other baby quilt.


And I love that the two baby quilts coordinate enough, but don't match. I used the same Kona Silver for the background on both, and the magentas are similar, but otherwise, the colors are different, even though they are in the same tonal range. While I'm sure I won't be able to resist the occasional matching outfits, I want these girls to feel different and unique, and that their twindom doesn't make up their entire identity. 


Terrazzo Quilt
completed August 2016
quilted by Abby Latimer

Monday, August 22, 2016

Times Square Baby Quilt

I've mentioned here before, and I'm sure I'll mention it again, but I believe every baby deserves a handmade baby quilt, preferably made by her mother. And so, when I found out I was having twins, I felt immediate pressure. I knew I could definitely get one baby quilt made by the time they were born, but two? I wasn't sure how I'd be feeling throughout the pregnancy. Luckily, my second trimester was pretty good, and I still have good days, even now. Because I felt the pressure of time (I knew making baby quilts after having twins was going to be a long shot at best...), I opted to make a quilt I already had cut out even though it was a bit big, and a really simple quilt I'd been wanting to make from Vintage Quilt Revival, the Times Square quilt.


The Times Square quilt was a little bigger than I needed, so I opted to change the outside border sizes and I also assembled it differently than instructed, adjusting the block sizes as well. I chose to make flying geese 4 at a time, using differently colored squares, and it worked out really well. 


I had a hard time deciding on my color scheme at first. I was really sure I was going to do magenta, mint, and butter yellow, but on a whim I tried out navy in place of the yellow and loved it. I decided to bind it in the yellow to brighten it and give a bit of contrast, and I'm really pleased with it. All the fabrics, except for the backing, were already in my stash, and it didn't use much fabric since it's such a minimalist design. The one trick was that I ended up cutting up my entire fat quarter of one of the magenta prints because, with my crazy pregnant brain, I literally could not cut it the right size. I mis-cut it three times before finally getting it right. After that, I took a little break...wish I'd taken one sooner! :-)


I wanted to back it in flannel, and found some Michael Miller flannel on Fat Quarter Shop for only $8.50 a yard, and I was totally willing to try it out for that price! It may not be as super soft as some flannels I've used, but it's pretty good. We'll see how it washes up.


The quilt finished up at 45" square, and I had Abby Latimer quilt it with a wave design that I had had in mind since I started the quilt. I really love it and I feel like it softens the straight line design really well. 

Now the only trick is deciding which baby gets it...

Times Square baby quilt
completed July 2016
quilted by Abby Latimer

Thursday, August 18, 2016

Sampler Shuffle Progress

I haven't posted progress since I first posted about starting the sampler, but I have been slowly working on it! It definitely takes a backseat to other things, so I haven't made a ton of progress, but I have made a total of 13 blocks so far. I think what I'll do is make most of the sampler shuffle blocks (omitting the appliqué blocks), and then fill in with blocks from the Splendid Sampler that Pat Sloan is hosting. I'm just not sure 30 blocks (what the Sampler Shuffle produces) is really a sufficient number for a good sized quilt. I've mentioned here before, I tend to go with a bigger is better philosophy when it comes to quilts...part of that is that my husband and I are both very tall (I'm only 6 feet tall, but my husband is 6'6") and I love being able to really wrap myself up in a quilt. And I don't really see any reason to rush this project by using really wide borders or alternating blank blocks to make it larger, so I'll just take my time and make a lot of blocks.


In the meantime, they're sitting on my design wall, looking very pretty. I love most of them, but there are a couple that I wish I had done differently, such as this one. I like the colors together, but there's not enough contrast.


My favorite so far is this one.


These blocks have been taking more time than I expected to make. I forget that it really does take quite a bit of time to make individual blocks, especially when they have more than 9 pieces. But, what also is taking longer, is that I generally try to use alternate piecing techniques to save fabric. I completely understand why the instructions are structured the way they are, but I hate cutting off itty bitty triangles that are going to end up in the garbage. So, when I need to make flying geese, I make them 4 at a time. Which means I need to go to the handy table I have saved from The Quilt Pattern Shoppe via Pinterest and make them that way. Same goes for half square triangles.


But, I like making them this way, even if it takes a few extra minutes to refigure cutting. I'm really enjoying this project and I'm totally okay with it being a very long term project.

Saturday, August 13, 2016

Arabian Night Quilt

So...probably two years ago, I won a bundle in a Fat Quarter Shop contest and received 9 yards of Cotton and Steel fabric. Yes, seriously. It was awesome! I was super excited about it and started thinking about patterns, and couldn't ever decide. And then Alison Glass's Handcrafted line took the internet by storm and I HAD to have some. I ordered a bunch of half yard cuts from Fabric.com before they changed their pricing model on quilting cotton, and when I received them, I realized how perfectly they went with the Cotton and Steel. And then I added in a bunch more fabric and ended up with a bundle and fell in love. And around the same time, I realized the perfect pattern would be the Arabian Night quilt from Angela Pingel's A Quilter's Mixology. I love her method for sewing curves, but cutting the fabric to sew those curves...not so much. So this project had a slow start.


And I was okay with that. I treated it like a back burner project and got it finished a lot quicker than I expected to, which is always a bonus! I started it last August, so it took me just about a year. I opted to use Kona Putty as the background instead of white because the AG Handcrafted really needed a non-white background in my opinion. The color isn't my favorite neutral, but I think it works really well with the fabrics.


I struggled with the borders and backing more than I usually do, and then again with the binding. With the fun prints of Handcrafted and Cotton and Steel, I didn't want to do something too crazy that would draw attention away from them (and my hard work at curved piecing) but I thought a solid border would be too plain.


I ended up taking the blocks to a local shop that carries more modern stuff, including Alison Glass, and while I was pretty sure I wanted Cotton and Steel, I ended up using a different Handcrafted print and I love it. I think it ties in the diverse colors really well without detracting from the design. I went with a simple Kona pink backing, and I bound it with some of the remainder of one of those Cotton and Steel prints.

I'm really happy with it! My husband thinks it's too busy, but I'm not sure I agree. I love the colors and the curves, and I'm pretty excited to have it finally finished!

Arabian Nights
Completed July 2016
long arm quilted by Abby Latimer

Saturday, July 30, 2016

Sunny's Table Runner

While my blog and IG have been pretty quiet, I have gotten a bit of sewing done. Not a lot, but a bit. I've been wrapping up loose ends that have been started at various stages, and have even done a few more Sampler Shuffle blocks. But today, I'm going to share this table runner I just finished for my friend Sunny. I made her a table runner two years ago for her birthday, and she just loves it, which makes me so happy! There's nothing like having your handmade gifts appreciated and valued. But, she moved. Boo! She still uses the table runner, but not on her main dining table like she did when she lived here. She requested another one, and I can't say no to a friend like Sunny, so I set about choosing fabrics.

Her new house is in a snowbird town, and for years, that's how they treated it. They would winter there and summer here. But it got to be too much for them and they decided to permanently relocate. So, I've visited their house, but couldn't compare colors quite as easily...so I took over a stack of fabric in the colors she requested (lipstick red, black, and cream) to let her pick and all my reds were way wrong. So when I visited her new home a couple months later, I took my color card with me and she picked Kona Crimson. Not exactly lipstick red, but that's okay. ;-) She picked out a fabric I had that had black and gold, and since I didn't have enough of anything for the designs I was considering, I picked up a black and a cream that had gold in them.


I chose a drunkard's path design, and I think she'll really like it! When it came to quilting, I was lost. So I did some simple echo quilting in the crimson section. I kept it nice and simple. 

What's great about this layout is that precision isn't super important in the curved piecing--there aren't  any points to line up. And since it's a table runner, I only needed 24 blocks, so it went together pretty fast! I used templates in the size I needed from Angela Pingel's A Quilter's Mixology.


This is way not my style, the colors definitely aren't what I would pick, but I really hope she loves it. Sometimes, making a quilt for someone else means working with things you wouldn't ever pick for yourself.

Sunny's Runner
pieced and quilted by me
Completed July 2016